Showing posts with label peanut butter. Show all posts

Friday, October 12, 2012

Chocolate & Peanut Butter Cupcakes with Halloween Candy Bark


Halloween is quickly approaching, so you know what that means...it's time to stock up on candy! There are a few Halloween candy staples that I must keep in my stash the entire month of October, which include Reese Pieces, Reese Cups, Peanut M&Ms and Butterfinger! YUM! As you can see the common theme with all these candies seems to be peanuts & peanut butter! So I had the idea to create a fabulous Halloween Candy bark to use a decoration on top of some chocolate and peanut butter cupcakes! This recipe was definitely created for all you chocolate and peanut butter lovers out there!

I love the pops or orange and yellow in the Halloween bark! I'm sharing the recipe for the cupcakes, candy bark and even a super cute way to individually package up these cupcakes for all your trick-or-treaters over at Half Baked!  So head on over and check it out! Definitely look around a bit while you are there too and drool over her fabulous Fresh Apple Donuts!

I've got a few more candy themed recipe ideas up my sleeve, so check back soon! What's your favorite Halloween Candy!

Happy Friday!

Wednesday, May 18, 2011

Chocolate, Caramel, Peanut Butter Heaven


I saw this cake a month or so ago on Sprinkle Bakes, one of my favorite blogs and my jaw dropped in awe of the complexity, the beauty, the ingredients and just the overall WOW factor of this cake. I mean the cake is absolutely gorgeous on the outside garnished with the chocolate curls, but then you cut into the cake and a whole new world is waiting for you...there's chocolate cake, peanut butter cups, caramel, nuts and cheesecake. Holy Cow this is my kind of dessert!

These are all of my favorite flavor combinations wrapped into one sweet package! I mean look at the caramel oozing out in between the chocolate cake and cheesecake layers...oh and those little brown specs peaking out of the cheesecake, those are peanut butter cups! They are a nice little surprise hidden inside only to be revealed when you take a bite!

Thank you Sprinkle Bakes for creating this AMAZING cake! The moment I laid eyes on your fabulous dessert I just knew I had to try and recreate it. I will flat out admit my cake doesn't even come close to being as perfect as yours was, but I can tell you this it tasted absolutely delicious!

My biggest struggle with the cake was the chocolate curls, they gave me fits! I think my very first piece of chocolate curled and then all the rest just ended up as chocolate shavings. Your video makes it look way too easy! I am definitely going to have to have another go at making chocolate curls one day but the heat and humidity hear in Mobile this time of year is tricky with chocolate.

I made this cake for a very special occasion and for a couple who loves all things chocolate and peanut butter! My good friend Katie is getting married soon and some of our friends recently threw them a crawfish boil couples shower! Of course I volunteered to bring the dessert and I knew this cake would be the perfect treat and something that no one had ever tried before.

Katie & Derek. Aren't they the cutest couple!

How sweet, feeding each other the cake for practice on their wedding day!

There is just one word to describe this cake....HEAVEN! Ooey gooey, caramely, chocolatey, peanutty, heaven!

I must admit this cake did require a lot of time, patience, ingredients and dirty dishes but it was absolutely worth it once you sink your teeth into a slice! It received rave reviews and there were literally only crumbs remaining after everyone kept going back for 2nds and 3rds.

If you want to be so adventurous to make this Peanut Butter Cup Chocolate Cake Cheesecake you can find out all the details here. This pretty much walks you through everything step-by-step with the recipes for each layer of the cake, photos for each step of assembling the cake and even a how to video on making the chocolate curls (which I WILL master one of these days!) So what are you waiting for hop on over to Sprinkle Bakes and check out the most divine, decadent and delicious cake I have ever tasted in my entire life! And while you are over there, stick around and check out some of her other fabulous recipes. She creates desserts unlike anything I have ever seen before and her photos are absolutely gorgeous! If only I could spend a day in her kitchen learning some of her baking secrets!

Hope you decide to give this cake a try, you won't be disappointed!

Sunday, September 19, 2010

Peanut Butter Granola Bars

Here's one of my favorite super simple and very yummy granola bar recipes that makes the perfect snack after a long run! I made these for my marathon team a few weeks ago after they ran their 20 mile training run. Loaded with oats, peanut butter and almonds they are a great source of getting carbs and protein back into the body quickly after burning so many calories.

My sister first told me about this recipe when a co-worker made them for her. The recipe is from Giada of the Food Network, my all time favorite chef so I just knew they were going to be amazing! These bake up to be a pretty soft and chewy granola bar and they definitely don't last long at my house.

Peanut Butter Granola Bars (Giada DeLaurentiis)

Ingredients:
-vegetable cooking spray
-1 egg white
-1/2 cup chunky peanut butter
-1/3 cup brown sugar
-1/4 cup honey
-1/2 cup (1 stick) unsalted butter, melted
-2 cups old fashioned oats
-1/4 cup slivered almonds, toasted, *see cook's note
-1/3 cup miniature chocolate chips

  • Position an oven rack in the middle of the oven. Preheat oven to 350 degrees.
  • Spray a 9 x 9 baking pan with cooking spray. Lay parchment paper in the pan, allowing the excess paper to hang over the sides. Spray the parchment paper lightly with cooking spray.
  • In a medium bowl, using a hand beater, beat the egg white until frothy. Stir in the peanut butter, brown sugar and honey. Add the melted butter, oats and almonds. Stir to combine, then add the chocolate chips.
  • Using a rubber spatula, spread mixture into the prepared baking pan, pressing lightly to form an even layer. Bake until the edge of the mixture begins to brown, about 15 minutes. Remove from the oven and let cool for at least 1 hour. Cut into 1 1/2-inch squares and serve.
  • *Cook's Note: To toast almonds, arrange in a single layer on a baking sheet. Bake in a preheated 350 degree oven until lightly browned, about 8 to 10 minutes.
After trying this recipe I guarantee you will no longer want to buy store bought granola bars!

Thursday, September 16, 2010

Cupcake a Week: Peanut Butter Pupcakes

Meet Tillman. This is my 11 year old baby that stares back at me all day long. Don't you just love these eyes? He's my only means of communication during the day since I work from home. He keeps me company laying beside my desk sleeping the day away, snoring occasionally while I stare at my computer for hours on end. He's got a rough life...sleeping, eating, wagging his tail, taking walks and sleeping some more. I'd love to be a dog for a day! Don't let his size scare you though, he is seriously a big teddy bear and the sweetest dog you will ever meet. He loves to cuddle and is spoiled rotten. He knows how to give you that sad puppy dog face when you are eating a plate full of food, anxiously awaiting to lick up any scraps. So I thought I would spoil Tillman a little more and make him a special batch of "pupcakes"...you know cupcakes for dogs!

These pupcakes were super easy to make and include some great ingredients like peanut butter, honey, apples and whole wheat flour. Any dog is sure to love these, Tillman sure did. I made larger size cupcakes, b/c well my dog is huge and pretty much swallowed these whole in one bite, but if you have a small dog I recommend making them as mini cupcakes!

Of course I had to document with photos Tillman's first taste of a pupcake...

A little bribery to get the drool going...

Open wide, be sure to release pupcake before your fingers get caught inside of those canines!

The entire pupcake is inside his mouth, all in one bite.

Gulp. Pupcake is gone...mmmm mmmm good!

These eyes get me every time, I just love looking at them, so precious.

Can I have another pupcake? Of course I gave in and gave him not 1 but 2 more pupcakes!

If you love your pup make them a batch of pupcakes today!

Peanut Butter Pupcakes (recipe adapted from bakespace.com)

Makes 16 standard size cupcakes

Ingredients:
-1 apple, finely chopped (I used granny smith)
-2 cup water
-1 egg
-3 cups whole wheat flour
-1 tablespoon baking powder
-2 tablespoons honey
-1/2 cup creamy peanut butter

  • Combine all ingredients in bowl except peanut butter and mix well.
  • Mix in peanut butter.
  • Spray cupcake pan with cooking spray.
  • Fill cupcake pan about 2/3 full with batter.
  • Bake at 350 degrees for 25 minutes.
Another of of Tillman's favorite treats are these Honey Love Biscuits.

Do you have any great recipes for dogs? I'd love to hear about them, I'm always looking for special treats for my pup!

Wednesday, August 18, 2010

Peanut Butter Chocolate Cake

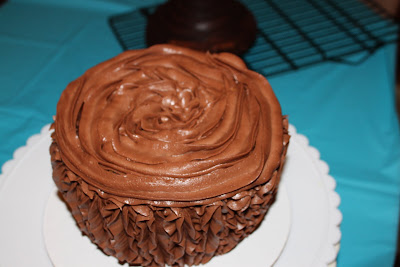
I'd like to introduce you to quite possibly one of my favorite cakes ever. It includes peanut butter and chocolate...anyone's mouth watering yet? I was looking for a cake recipe that included peanut butter and came across this amazing recipe on Smitten Kitchen. My friend VV is getting ready to move away and I wanted to make her a special cake since she is a peanut butter lover! I had made her Peanut Butter and Jelly cupcakes for her birthday before so I wanted to go a different route with a new peanut butter flavor combination this time.

When I discovered this 3 layer chocolate cake with a peanut butter icing and then a chocolate peanut butter glaze on top of that I knew this was going to be just the perfect dessert for VV!

Let me just warn you this is one RICH cake. Make sure you have a tall glass of milk to wash it down with.

I love the dripping look of the chocolate glaze over the peanut butter frosting. A double dose of icing...YUM!

VV is in peanut butter heaven with this cake! She even went back to eat more of the peanut butter icing after she finished her slice of cake.

So for all you peanut butter and chocolate lovers out there, you have got to try this cake recipe, it doesn't get much better than this! I've also used this same recipe for mini cupcakes before and they were just as delicious!

Tuesday, July 27, 2010

Peanut Butter & Chocolate Chip Ice Cream

Well summer seems to be flying right on by and this is the first time I have made homemade ice cream! What have I been waiting for! I decided it was finally time to break out the old ice cream maker and whip up a nice cool treat for after dinner dessert since July is National Ice Cream Month. I am a huge ice cream fan, I love all flavors, especially the ones with chocolate and chunks of stuff whether it be nuts, chocolate chips, cookie dough, or candy bars.

Recently I discovered a Peanut Butter Chocolate Chip Ice Cream from Heather at Multiply Delicious. I first found Heather's blog when I entered the Real Women of Philadelphia Competition and submitted my recipe for Jammin' Strawberry Cream & Chocolate Cupcakes. During the competition I discovered so many amazing blogs by women who love to bake and cook all over the country and I have been following several of them ever since. I just love getting recipe ideas and inspiration from other blogs.

I am so excited about my latest find at TJMaxx...this set of 4 ice cream bowls & spoons in fun vibrant summery colors for only $4.99. What a steal! I love shopping around for fun props to display my food in and TJMaxx is a great go to place for unique and cheap items. These bowls were absolutely perfect for serving up this batch of ice cream!

So if you are looking for a fun summer ice cream recipe that doesn't take much prep time this is a delicious recipe and sure to be a crowd favorite!

Peanut Butter & Chocolate Chip Ice Cream (adapted from Multiply Delicious)

-1/2 cup creamy peanut butter
-1/2 cup granulated sugar
-1/2 cup light brown sugar
-2 cups heavy cream
-1 1/2 cups milk
-1 1/2 tsp vanilla
-3/4 cup chocolate chips

  • With an electric mixer beat peanut butter and sugars until creamy.
  • Add milk and mix for 1-2 minutes.
  • Mix in heavy cream and vanilla extract.
  • Pour mixture into the bowl of an electric ice cream maker. (I have this Cuisinart ice cream maker)
  • Follow the directions on the ice cream maker and cream mixture for about 25-30 minutes.
  • In the last 5 minutes of mixing, stop the ice cream maker, stir in the chocolate chips.
  • Turn ice cream maker back on and continue mixing for 5 minutes.
  • Ice cream will be the consistency of soft serve and will be ready to eat right away.
  • For a more firm consistency ice cream transfer the batch to a plastic container and place in the freezer for a few hours or overnight.
Are you planning on making some homemade ice cream this summer? I'd love to hear what your favorite flavor is!

Thursday, May 27, 2010

Monster Cookie Bars

I'm super excited to share with you all this new recipe! If you've been following my site then you know I love the combination of chocolate and peanut butter and I'm also a fan of oatmeal! So I've created what I consider to be a crossover between a granola bar and chocolate chip cookie all wrapped up in one cookie bar. Of course there are a few other special ingredients like M&Ms and chopped pecans all mixed in for a pop of color and some added texture!

My friend Katie had a fundraiser last weekend with her 3rd grade students and it was all about promoting a healthy lifestyle and teaching them how exercising can be fun while at the same time raising money for the Leukemia & Lymphoma Society! I told Katie I would come up with a somewhat "healthy" snack for her to sell at her event's bake sale.

Trail mix seems to be a pretty popular snack for kids these days so I figured I would use some nuts and M&Ms which are commonly found in trail mix and combine it with another kid friendly food peanut butter for some protein! I secretly added some quick oats to the cookie batter for some fiber too...shhh don't tell! The kids are going to be drawn to the colorful M&M's popping out of the cookies they aren't even going to realize what they are eating is good for them! I know, I'm a little sneaky!

These cookie bars turned out super yummy and the peanut butter flavor really came through in every bite! This recipe can be super versatile, so feel free to add in some of your favorite "special" extra ingredients maybe some pumpkin puree instead of peanut butter and some dried cranberries! Or sub out the pecans and add in some walnuts or macadamia nuts and white chocolate chips! Really the possibilities are endless with this cookie bar so just have fun and mix in any great flavor combinations that you love!

Monster Cookie Bars

Ingredients:
-1 cup butter, room temperature
-1 cup peanut butter
-3/4 cup brown sugar
-3/4 cup sugar
-2 eggs
-2 cups all-purpose flour
-1 tsp baking soda
-1/2 tsp salt
-1 tsp vanilla
-1 cup M&Ms
-2 cups quick oats
-1/2 cup chopped pecans
-1/2 cup semi-sweet chocolate chips

  • Preheat oven to 350 degrees. Lightly grease a 13 x 9 baking dish.
  • Cream butter, peanut butter and sugars on medium speed of electric mixer until creamy.
  • Add in eggs one at a time beating well after each addition.
  • Add in vanilla.
  • Combine flour, baking soda and salt in a bowl. Add dry ingredients to butter and sugar mixture and mix until combined.
  • Add M&Ms, quick oats, chopped pecans and semi-sweet chocolate chips to cookie batter and stir until combined.
  • Spread batter into prepared baking dish.
  • Bake for 30 minutes. Cool for 20 minutes.
  • Grab a glass of milk and enjoy!

Thursday, April 15, 2010

Cupcake a Week: Chocolate & Peanut Butter Swirl


Have you ever made a jumbo cupcake? Let's just say this was my first and not so great experience using the Wilton giant cupcake pan. It started out as a good idea...


I had some left over Reese's Cups from Easter...so what came to mind...a jumbo chocolate and peanut butter cupcake! I LOVE that flavor combination!


I made a chocolate cake batter and a peanut butter mixture that were swirled together in the pan. I taste tested both batters and so far they were super yummy! But while the cake was baking the middle just never seemed to firm up. I kept doing the toothpick test but the center still seemed gooey. So I'd leave it in for 5 more minutes, then 5 more minutes. Finally I just decided to pull the cake out of the oven because the outer edges were definitely ready. I just kept my fingers crossed the cake would be firm enough to stack.


While the cake cooled I made a batch of chocolate buttercream and a batch of peanut butter cream cheese icing and placed in piping bags so I'd be ready to decorate.


Then it was time to frost the bottom of the cupcake. I used a star tip and piped vertical strips of icing all the way around.


Then I swirled chocolate icing around the center of the cake before adding the top of the cupcake.


Then I swirled alternating rings of chocolate buttercream and peanut butter icing. So far the cake seems to be pretty sturdy...icing is almost complete.


Now for the Reese's Cups...I chopped the mini candies into four pieces and had planned to use these as a garnish on top of the cupcake...but my plan just didn't quite seem to fall into place. Brace yourself for the next picture you are about to see....


Literally in the blink of an eye my cupcake started to collapse. I didn't even have the Reese's cups on top of it yet...the whole inspiration behind this cupcake. So basically I just panicked knowing any minute the entire cupcake could collapse and I just threw some Reese's on top so I could at least get a picture.

This is just so sad...I mean where did the bottom of the cupcake go...it looks like it never even existed. Has anyone else ever made a giant cupcake and had the bottom completely crumble??? I am convinced it must be the peanut butter mixture that was swirled in the middle of the cupcake and that there wasn't enough stability b/c the center was too gooey...does this sound like the reason for the failure? And this isn't even the worst picture...about 5 minutes later it had fallen over a few more inches. Where you see the ring of peanut butter icing, it was pretty much touching the edge of the plate. What a bummer!

But let's look on the bright side...even though the cupcake crumbled it's still edible right? So what did I do, I grabbed a fork and dug right in...and I must say it was super yummy! I definitely recommend you still try this recipe, just maybe with smaller cupcakes in mind!

Chocolate Peanut Butter Swirl Cupcakes

Chocolate cake:
-1 box Devils Food cake mix
-1/2 cup vegetable oil
-3 eggs
-1 cup chocolate milk

  • Preheat oven to 350 degrees. Prepare desired cake or cupcake pans.
  • Combine all ingredients in a bowl and mix with an electric mixer on medium speed for 2 minutes.
  • Set batter aside.
  • Prepare peanut butter filling.

Peanut Butter Filling:
-1 stick unsalted butter, melted
-1 cup confectioners' sugar
-1 1/4 cups peanut butter
-1/2 teaspoon salt
-1 teaspoon vanilla extract
  • Stir together all ingredients until smooth.
  • Layer mixtures into pans as follows: chocolate, peanut butter, chocolate, peanut butter, chocolate
  • Take a knife and swirl the chocolate and peanut butter layers together.
  • Bake in the oven according to the required time for the pan size you use (for the jumbo cupcake it took about 45 minutes...but again use this recipe in the jumbo pan at your own risk, based on the outcome of my cake...I don't recommend it)
  • Frost with chocolate buttercream and peanut butter cream cheese icing.
Chocolate Buttercream

- 2 sticks unsalted butter, room temperature
-6 cups confectioners' sugar
-1/2 cup milk
-1/2 teaspoon vanilla extract
-1/2 cup cocoa powder

  • Beat butter on medium speed in electric mixer until creamy.
  • Add in confectioners sugar, milk and vanilla and beat until desired consistency.
  • Mix in cocoa powder.
Peanut Butter Cream Cheese Icing

-1/2 stick unsalted butter, room temperature
-3 oz cream cheese, softened
-1/2 cup peanut butter
-1 cup confectioners' sugar
  • Beat butter on medium speed in electric mixer until creamy.
  • Add in cream cheese and peanut butter and mix well until combined.
  • Add confectioners' sugar and beat on medium until fluffy.
ENJOY!

Sunday, December 20, 2009

Countdown to Christmas Day 20: Buckeye Balls


Happy Dec 20th! Only 5 more days until Christmas, and 2 more days until I start my road trip to KY to see my family for the holidays! Since I am heading north, and will be just outside of Ohio, which is the Buckeye state, I wanted to be sure I made one of my family's favorite candies...Buckeye Balls! Peanut Butter & confectioners sugar dipped in chocolate, what could be better than that? This is one super RICH candy but you can't just eat one...I find myself popping them in my mouth, one after another.


First you make the peanut butter and sugar mixture. Then you roll them into balls and place on a cookie sheet to chill.


Insert a toothpick into peanut butter balls so they are easy to dip in chocolate.


Melt chocolate and start dipping in chocolate coating.


You only want to dip the peanut butter balls about 3/4 of the way in the chocolate because they are suppose to look like actual buckeyes, which is the state tree in Ohio.


After you dip the balls in the candy coating chill in the fridge to allow the chocolate to set. Remove the toothpicks and smooth over the holes.


Buckeye Balls (recipe from Jif Peanut Butter website)

Ingredients
1 1/2 cups Jif Creamy Peanut Butter
1/2 cup butter or margarine, softened
1 teaspoon vanilla
1/2 teaspoon salt
3 to 4 cups confectioners sugar

Coating
1 pound chocolate flavor candy coating
2 tablespoons Crisco Shortening

  • Combine Jif, butter or margarine, vanilla and salt in large bowl. Beat at low speed of electric mixer until blended.
  • Add 2 cups sugar. Beat until blended.
  • Continue adding 1/2 cup sugar at a time until mixture shaped into ball will hold onto toothpick.
  • Shape into 3/4 inch balls. Place on tray. Chill.
  • For coating, combine candy coating and Crisco Shortening in microwave-safe bowl.
  • Microwave at 50% (medium) for 30 seconds. Stir. Repeat until mixture is smooth.
  • Insert toothpick in candy ball. Dip three-fourths of ball into melted coating.
  • Scrape off excess.
  • Place on waxed paper lined tray.
  • Remove toothpick. Smooth over holes.
  • Refrigerate until coating is firm then remove from paper.
  • Store at room temperature in covered container.
  • Makes 8 dozen.
ENJOY!

Sunday, December 13, 2009

Countdown to Christmas Day 13: Hershey's Kisses Peanut Butter Blossoms


Happy Dec 13th! I can't believe the weekend is already over and its time for Monday again! So to start the week off right I wanted to bake a batch of another one of my favorite Christmas cookies...Hershey's Kisses Peanut Butter Blossoms. I just love the combination of peanut butter and chocolate.


Start off by unwrapping one of the best pieces of chocolate ever, Hershey's Kisses.


Prepare the peanut butter dough, roll into balls and coat in sugar.


Bake the peanut butter balls and immediately after you pull them out of the oven, place a Hershey's Kisses in each of them. The warmth of the dough allows the kisses to set to the cookie. If you pop one of these in your mouth while they are still hot, the chocolate just melts in your mouth. Delicious!


I love the sparkle of the sugar crystals on these cookies.

Hershey's Kisses Peanut Butter Blossoms

Ingredients

48 Hershey's Kisses Milk Chocolates
1/2 cup shortening
3/4 cup creamy peanut butter
1/3 cup granulated sugar
1/3 cup packed light brown sugar
1 egg
2 tablespoons milk
1 teaspoon vanilla extract
1 1/2 cups all-purpose flour
1 teaspoon baking soda
1/2 teaspoon salt
granulated sugar

  • Heat oven to 375 degrees.
  • Remove wrappers from chocolates.
  • Beat shortening and peanut butter in large bowl. Add 1/3 cup granulated and brown sugar; beat until fluffy. Add egg, milk and vanilla; beat well. Stir together flour, baking soda and salt; gradually beat into mixture.
  • Shape dough into 1-inch balls. Roll in sugar; place on ungreased cookie sheet.
  • Bake 8 to 10 minutes or until lightly browned. Immediately press a KISSES Chocolate into center of each cookie. Remove from cookie sheet to wire rack. Cool completely.
  • Makes about 4 dozen cookies.
ENJOY!
Related Posts with Thumbnails