Showing posts with label ice cream sweets. Show all posts

Tuesday, August 2, 2011

Neapolitan Brownie Ice Cream Cake

Happy August! I can't believe summer is flying right on by and Fall will be here before we know it! This summer has been extremely hot and humid in Mobile, so I've found myself not wanting to turn on the oven and bake quite as often. Being able to open the freezer and find a sweet treat is what I'm all about these days.

Remember the Homemade Vanilla Bean Ice Cream recipe I shared with you a few days ago? Well sometimes when I eat ice cream I crave chocolate too, and cake and icing...so I decided to create a Neapolitan Brownie Ice Cream Cake just to cover all my cravings in one delicious bite!

The ice cream layer sandwiched in between two layers of chocolate is absolutely perfect. And the thin layer of strawberry buttercream adds a little extra sweetness to each bite of cake.


I cut a slice for me and a slice for you...but then I had to eat your slice because, well, it was melting and I'm addicted and it was just too darn good!

Chocolate, vanilla and strawberry not your favorite flavor combination...well the possibilities are truly endless when making an ice cream cake. You can swap out the brownie layers for your favorite cake instead.

Don't have an ice cream maker and don't want to make your own from scratch...go buy a half gallon of your favorite flavor and keeps things simple! Heck add a second layer of ice cream and feature two of your favorite flavors!

Don't want to dirty up your mixer to make the buttercream...why not ice the cake with a chocolate ganache or some whipped cream.

See what I mean, you can go a million ways with this idea! So play around with what works best for you and go create a fabulous ice cream cake masterpiece! I sure did have fun with this one, but I'm envisioning one with chocolate chips or Oreos next time around. Or maybe even a Snickers Ice cream bar cake...YUM!

Neapolitan Brownie Ice Cream Cake
(makes one 3-layer 8" cake)

-box of brownie mix
-Homeade Vanilla Bean Ice Cream
-Strawberry Buttercream (recipe below)


1.Prepare brownie mix per package directions. Bake in two 8" cake pans. Allow brownie layers to completely cool before assembling cake.
2.Line an 8" cake pan with aluminum foil. Scoop ice cream into prepared pan. I used 8 scoops and spread flat with a spatula. Place a layer of foil on top of the ice cream and place pan in freezer to firm up for 2-3 hours prior to assembling cake.
3.Place one layer of brownie on cake plate for bottom layer. Remove ice cream layer from freezer and place on top of brownie layer. Add the second brownie layer on top of the ice cream layer. Tightly wrap cake in foil and place back in the freezer for 2 hours to firm up.
4.Remove frozen cake from freezer and frost with Strawberry Buttercream. You will need to work quickly when icing the cake as it tends to harden fast since the cake is frozen. Once the cake is completely frosted place back in the freezer until ready to serve.


Strawberry Buttercream
-2 sticks unsalted butter, softened
-5 cups confectioner's sugar
-1 tsp strawberry extract
-3 Tbsp milk

-Beat butter with stand mixer until creamy.
-Gradually add in confectioner's sugar, scraping sides of bowl as necessary.
-Add in strawberry extract and milk and mix until desired consistency.

So what flavors would make up your perfect Ice Cream Cake?

Wednesday, July 27, 2011

Homemade Vanilla Bean Ice Cream

I couldn't let summer fly by, much less the month of July (National Ice Cream Month!) without posting at least one homemade ice cream recipe! Afterall, I am an ice cream junkie and most nights during June, July and August I can be seen with a bowl of ice cream lathered in chocolate and caramel sauce stuffing my face! Typically my favorite ice cream flavors include chocolate in some form...chocolate chip or cookies n' cream, but today it's all about good ole vanilla! Let me tell you, this Vanilla Bean Ice Cream recipe is pretty much the most delicious batch of ice cream I have ever tried. Good bye store bought ice cream, hello homemade for the rest of the summer!

I was first inspired to make homemade ice cream while on a 5:00AM trip to Walmart a few weeks ago when I spotted these fun little gems...mini wafer bites with white chocolate and rainbow jimmies. Why you ask was I at Walmart so stinking early? Well it was to get some surprise birthday goodies for a running friend before our 6:00AM run that morning. These wafers caught my eye while I was in the bakery section looking for some store bought cupcakes (I am ashamed to admit this giving my love for homemade cupcakes...but time just ran out for me to whip up a batch from scratch). Please forgive me for buying store bought cupcakes...but hey something good did come of it right...the idea for this homemade ice cream!


Vanilla Bean Ice Cream (adapted from David Lebovitz, The Perfect Scoop)

Makes 1 quart

Ingredients:
-1 cup whole milk
-pinch of salt
-3/4 cup sugar
-1 Tbsp vanilla bean paste
-1 cup heavy cream
-1 cup half and half
-7 large egg yolks
-1 tsp pure vanilla extract

1.Heat milk, salt and sugar in saucepan. Add the vanilla bean paste into the milk. Cover, remove from heat and infuse for one hour.
2.To make the ice cream, create an ice bath by placing a 2-quart bowl inside of a large bowl that has been filled with ice and water. Place a strainer over top of the smaller bowl and pour the cream into the bowl.
3.In a separate bowl, stir together the egg yolks. Rewarm the milk and gradually pour some of the milk into the yolks, whisking constantly as you pour to temper the mixture so the eggs don't scramble. Pour the warmed yolks and milk back into the saucepan.
4.Cook over low heat, stirring constantly and scraping the bottom with a heat-resistant spatula, until the custard thickens enough to coat the spatula.
5.Strain the custard into the heavy cream. Stir over the ice bath until cool. Add the vanilla extract, then refrigerate to chill thoroughly. I kept refrigerated overnight.
6.Remove the custard from the refrigerator and freeze in your ice cream maker according to the manufacturer's instructions. I have this Cuisinart ice cream maker and mixed the custard for 25 minutes.
7.Ice cream will be soft and should be eaten immediately or placed in an airtight container in the freezer to firm up for a few hours or even overnight.

If you desire add some of your favorite toppings to your ice cream. I added some fresh pureed strawberries on top and it was delish!

Promise me you will make this vanilla bean ice cream before summer is over! It is rich, creamy and I love the little black specs of vanilla bean throughout! It was soooo good, I actually made 2 batches! Check back soon because I have a great way to take this ice cream recipe one step further and turn it into a fabulous ice cream cake you are gonna love!

Tuesday, July 27, 2010

Peanut Butter & Chocolate Chip Ice Cream

Well summer seems to be flying right on by and this is the first time I have made homemade ice cream! What have I been waiting for! I decided it was finally time to break out the old ice cream maker and whip up a nice cool treat for after dinner dessert since July is National Ice Cream Month. I am a huge ice cream fan, I love all flavors, especially the ones with chocolate and chunks of stuff whether it be nuts, chocolate chips, cookie dough, or candy bars.

Recently I discovered a Peanut Butter Chocolate Chip Ice Cream from Heather at Multiply Delicious. I first found Heather's blog when I entered the Real Women of Philadelphia Competition and submitted my recipe for Jammin' Strawberry Cream & Chocolate Cupcakes. During the competition I discovered so many amazing blogs by women who love to bake and cook all over the country and I have been following several of them ever since. I just love getting recipe ideas and inspiration from other blogs.

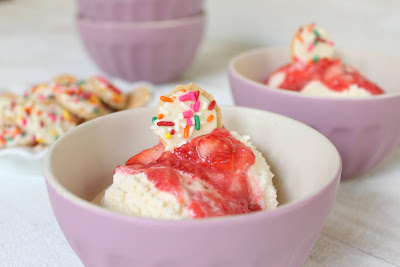
I am so excited about my latest find at TJMaxx...this set of 4 ice cream bowls & spoons in fun vibrant summery colors for only $4.99. What a steal! I love shopping around for fun props to display my food in and TJMaxx is a great go to place for unique and cheap items. These bowls were absolutely perfect for serving up this batch of ice cream!

So if you are looking for a fun summer ice cream recipe that doesn't take much prep time this is a delicious recipe and sure to be a crowd favorite!

Peanut Butter & Chocolate Chip Ice Cream (adapted from Multiply Delicious)

-1/2 cup creamy peanut butter
-1/2 cup granulated sugar
-1/2 cup light brown sugar
-2 cups heavy cream
-1 1/2 cups milk
-1 1/2 tsp vanilla
-3/4 cup chocolate chips

  • With an electric mixer beat peanut butter and sugars until creamy.
  • Add milk and mix for 1-2 minutes.
  • Mix in heavy cream and vanilla extract.
  • Pour mixture into the bowl of an electric ice cream maker. (I have this Cuisinart ice cream maker)
  • Follow the directions on the ice cream maker and cream mixture for about 25-30 minutes.
  • In the last 5 minutes of mixing, stop the ice cream maker, stir in the chocolate chips.
  • Turn ice cream maker back on and continue mixing for 5 minutes.
  • Ice cream will be the consistency of soft serve and will be ready to eat right away.
  • For a more firm consistency ice cream transfer the batch to a plastic container and place in the freezer for a few hours or overnight.
Are you planning on making some homemade ice cream this summer? I'd love to hear what your favorite flavor is!

Tuesday, December 1, 2009

Countdown to Christmas Day 1: Ice Cream Ornaments


Happy December 1st! I have been anxiously awaiting this day so I can start my Christmas baking. December is my absolute favorite month to bake during the year. As you all know from a post I did last week, I have created an Advent Calendar to use for my holiday sweets as I count down the 24 days to Christmas. Hopefully you all will enjoy the sweets I have chosen to feature on my blog over the next 24 days and will get some ideas for treats you can make for your holiday festivities this year.

Today was day 1 and underneath the first window of my homemade muffin tin advent calendar my first holiday treat was revealed "Ice Cream Ornaments". I love unique, bright and colorful ornaments especially ones with glitter that sparkle when the tree lights hit them. We got our Christmas tree on Sunday and last night we finished decorating it with all the ornaments. So I thought as you all are starting to decorate your trees as well it would be fun to make some homemade edible ornaments of your own!


Check out how cute these ice cream ornaments look! I saw this idea in a Breyers Ice Cream ad last year and thought it was such a unique idea that I had to re-create it myself. These would be perfect to use for a kids holiday party.

Ice Cream Ornaments

1 container (1 1/2 qt) Breyers All Natural French Vanilla Ice Cream
24 mini peanut butter cups
24 pieces (1 1/2 in. ea.) thin red licorice
multicolored sprinkles
  • Line a jelly-roll pan with aluminum foil, spray with nonstick cooking spray, and freeze at least 20 minutes.
  • Scoop ice cream into 24 firmly packed scoops; roll into balls.
  • Arrange on prepared pan; freeze 2 hours.
  • Meanwhile, make ornament hangers. Poke 2 holes in small flat side of peanut butter cups with skewer. Add licorice hanger by pushing ends into holes; freeze.
  • Roll ornaments in sprinkles.
  • Attach hanger by pressing onto top of ornament; freeze until ready to serve.
  • Makes 24 servings.

Here's a picture of our Christmas tree and a scene of one of the classic holiday movies with Clark Griswold in National Lampoon's Christmas Vacation. My husband and I are watching this movie right now as we are eating our ice cream ornaments! Holiday sweets, sitting in front of our tree and watching a Christmas movie, the night can't get much better than this!

Check back tomorrow for another holiday treat on Countdown to Christmas Day 2!
Related Posts with Thumbnails