Showing posts with label pumpkin. Show all posts

Thursday, November 22, 2012

Pumpkin Cookies

Wishing you all a Happy Thanksgiving and a wonderful day with the ones you love! It's been an amazing year as we were blessed with our little boy Sam and I can't even imagine my life without him. He brings us so much joy, happiness and laughter each day! I can't believe he is already 8 months old! We are so thankful to have him in our lives! I recently made these pumpkin cookies as a "thank you" to Sam's daycare workers. They take such great care of him while we work and I wanted to show them our appreciation with a little fall treat! This time of year you can't go wrong with anything pumpkin as far as I'm concerned so I thought pumpkin cookies would be super cute to show our appreciation.


I also packaged up some cookies and took them to the post office! I am a frequent visitor to our local post office and so from time to time I like to say thank you in the form of sweets! They are always so excited and appreciative when I bring them in some cake pops or cookies.


So on this day let's all remember to "slow down" (I know this is extremely hard for me) and spend time with family and remember to say "thanks" and be appreciate for all of the blessings in our life!

Happy Thanksgiving to you all!

Wednesday, November 2, 2011

Pumpkin Cupcakes with Cinnamon Cream Cheese

Happy November! I can't believe Thanksgiving is just around the corner! To get you ready for the big turkey day feast I'm excited to share a delicious cupcake recipe featuring pumpkin as the star ingredient! You have gotta add these Pumpkin Cupcakes with Cinnamon Cream Cheese Frosting to your holiday baking this year!

The recipe for these fall cupcakes is posted over at Half Baked so go check it out!

Hope you all have a wonderful November! I'm so thankful to have such great followers of CIS!

Sunday, November 21, 2010

Pumpkin Pecan Chocolate Chip Pie

Only 4 more days until the big turkey feast, are you ready? I can't wait for turkey, potatoes, stuffing, veggies and of course the pies! Thanksgiving may just be my favorite meal of the year! So much delicious food and left overs for days! I am craving some dark meat turkey right about now.

We are heading to Clemson, SC this year to spend the holiday with Randolph's family. I'm excited to head back to my college alma mater. It will be a nice change of scenery for a few days and hopefully the air will be a little more crisp and cool than what we have been experiencing here in Mobile. It just doesn't feel like Fall when the temps are in the high 70s. We are looking forward to taking a trip up to the mountains and checking out the vibrant leaves and getting some fresh apple cider. But before I head out of town I want to leave you all with one last pumpkin recipe.

If you are still finalizing your Thanksgiving menu and looking for that perfect pie recipe, I think I've come up with one that you will enjoy! Take the traditional pumpkin pie to the next level by adding a chocolate chip, pecan and brown sugar topping! Your guests are sure to love a slice of this pie!

Pumpkin Pecan Chocolate Chip Pie

Ingredients:
-3/4 cup sugar
-1/2 tsp salt
-2 tsp cinnamon
-2 large eggs
-1 can (15 oz) Libby's 100% Pure Pumpkin
-1 can (12 oz) evaporated milk
-1 unbaked 9-inch deep-dish pie shell

Pecan Chocolate Chip Topping

Ingredients: (mix all together and set aside)
-1 cup chopped pecans
-1 cup semi-sweet chocolate chip
-1/4 cup light brown sugar
-2 Tbsp melted butter

  • Mix sugar, salt and cinnamon in small bowl.
  • Beat eggs in large bowl.
  • Stir in pumpkin and sugar-spice mixture.
  • Gradually stir in evaporated milk.
  • Pour mixture into pie shell.
  • Bake in preheated 425 degree oven for 15 minutes. Reduce temperature to 350 degrees and bake 40 minutes.
  • Remove pie from oven and add Pecan Chocolate Chip topping. Bake an additional 10 minutes or until knife inserted in center comes out clean.
  • Cool on wire rack.
What are your plans for Thanksgiving this year? Does your family have a favorite pie?

Sunday, November 7, 2010

Whoopie!

Pumpkin, cinnamon and cream cheese...what can be better on a cool fall day! I am absolutely loving these mini pumpkin whoopie pies with cinnamon cream cheese sandwiched in between! Whoopie pies have been popping up all over the blog world lately, and ever since I first laid eyes on them they have been on my must make list!

I made a batch of these for Halloween last weekend to share with our neighbors and everyone loved them! If you are looking for a Thanksgiving treat that doesn't require much prep and are full of fall flavors you have got to make these! These may just be a new crowd favorite over pumpkin pie!


Pumpkin Whoopie Pies with Cinnamon Cream Cheese (makes 30 mini sandwiches)

Ingredients:
-3 cups all-purpose flour
-1/2 cup granulated sugar
-1/2 cup light brown sugar
-1 tsp baking soda
-1 tsp baking powder
-1 tsp salt
-2 Tbsp cinnamon
-2 tsp nutmeg
-2 tsp ginger
-1 cup vegetable oil
-1 tsp vanilla
-2 eggs
-3 cups pumpkin puree, chilled (this will prevent batter from spreading when baking)

  • Preheat oven to 350 degrees.
  • Line baking pans with parchment paper.
  • Mix dry ingredients in large bowl: flour, baking soda, baking powder, salt, cinnamon, nutmeg and ginger.
  • In a separate bowl mix sugars and vegetable oil until combined.
  • Mix in pumpkin puree until combined.
  • Add in eggs and vanilla and mix well.
  • Gradually add flour mixture into pumpkin mixture stirring until just combined.
  • Use a small ice cream scoop and drop balls of dough onto prepared baking sheets about 1 inch apart.
  • Bake about 15 minutes, until tooth pick inserted in center comes out clean.
  • Let cakes cool on wire rack before adding cream cheese filling.
Cinnamon Cream Cheese

Ingredients:
-8 oz cream cheese, softened
-1 stick unsalted butter, softened
-3 cups confectioner's sugar
-1/2 tsp vanilla
-1/2 tsp cinnamon

  • Combine cream cheese and butter in bowl and mix with electric mixer on medium speed until creamy.
  • Gradually add confectioner's sugar 1 cup at a time, mixing well after each addition.
  • Mix in vanilla and cinnamon.
  • Transfer Cinnamon Cream Cheese filling to pastry bag.
  • To assemble, turn half of the cakes over so the flat side is facing up. Using the pastry bag, squirt a dollop of the cream cheese filling on top and then sandwich them with another piece of cake.
  • Place finished whoopie pies in airtight container and place in refrigerator for 30 minutes before serving. Cookies can be stored for up to 3 days.

Tuesday, November 2, 2010

Pumpkin Pie Pops

Happy November and Happy Pumpkin Month...well at least in my house there will be pumpkin all month long! I absolutely love the fall flavors of pumpkin and cinnamon so get ready for some festive holiday sweets that will be great additions at your Thanksgiving feast this year! If you don't like recipes with pumpkin I promise to sprinkle in a few other recipes as well this month...how about apples? Do you like apples? I'm thinking maybe an apple pie or apple cake/cupcakes sound mighty tasty! And for all you chocolate lovers out there, I'm sure there will be at least one recipe that contains chocolate for you too! So let's welcome November with some pumpkin, shall we?

This first recipe is a spin off of the traditional pumpkin pie! After all, is it really Thanksgiving without pumpkin pie? I'm excited to share with you my mini pumpkin pie pop! I don't know about you but my favorite part of any pie is the crust, so this pie pop is fantastic b/c you get double the crust and tons of cuteness! I guarantee any kid will want to take a bite out of one of these!

So let's get started on the assembly!

Roll out refrigerated pie crust and cut out circles.

Sprinkle crust with a cinnamon & sugar mixture! This takes me back to my childhood, sometimes my mom would pull a pie crust out of the fridge and sprinkle the entire thing with cinnamon & sugar and bake it up. She would cut it into triangle slices like a pizza and we would eat it for dessert! Yum!

Next add a small dollop of pumpkin pie mixture. You don't want too much or the filling will squeeze out the sides when you put the top crust on.

Place a lollipop stick on top of the pumpkin pie filling.

Place another pie crust circle on top to close off the pie.

Take a lollipop stick and gently press all the way around the edges to seal the top and bottom crusts together.

Pies are sealed and ready to add a little personality!

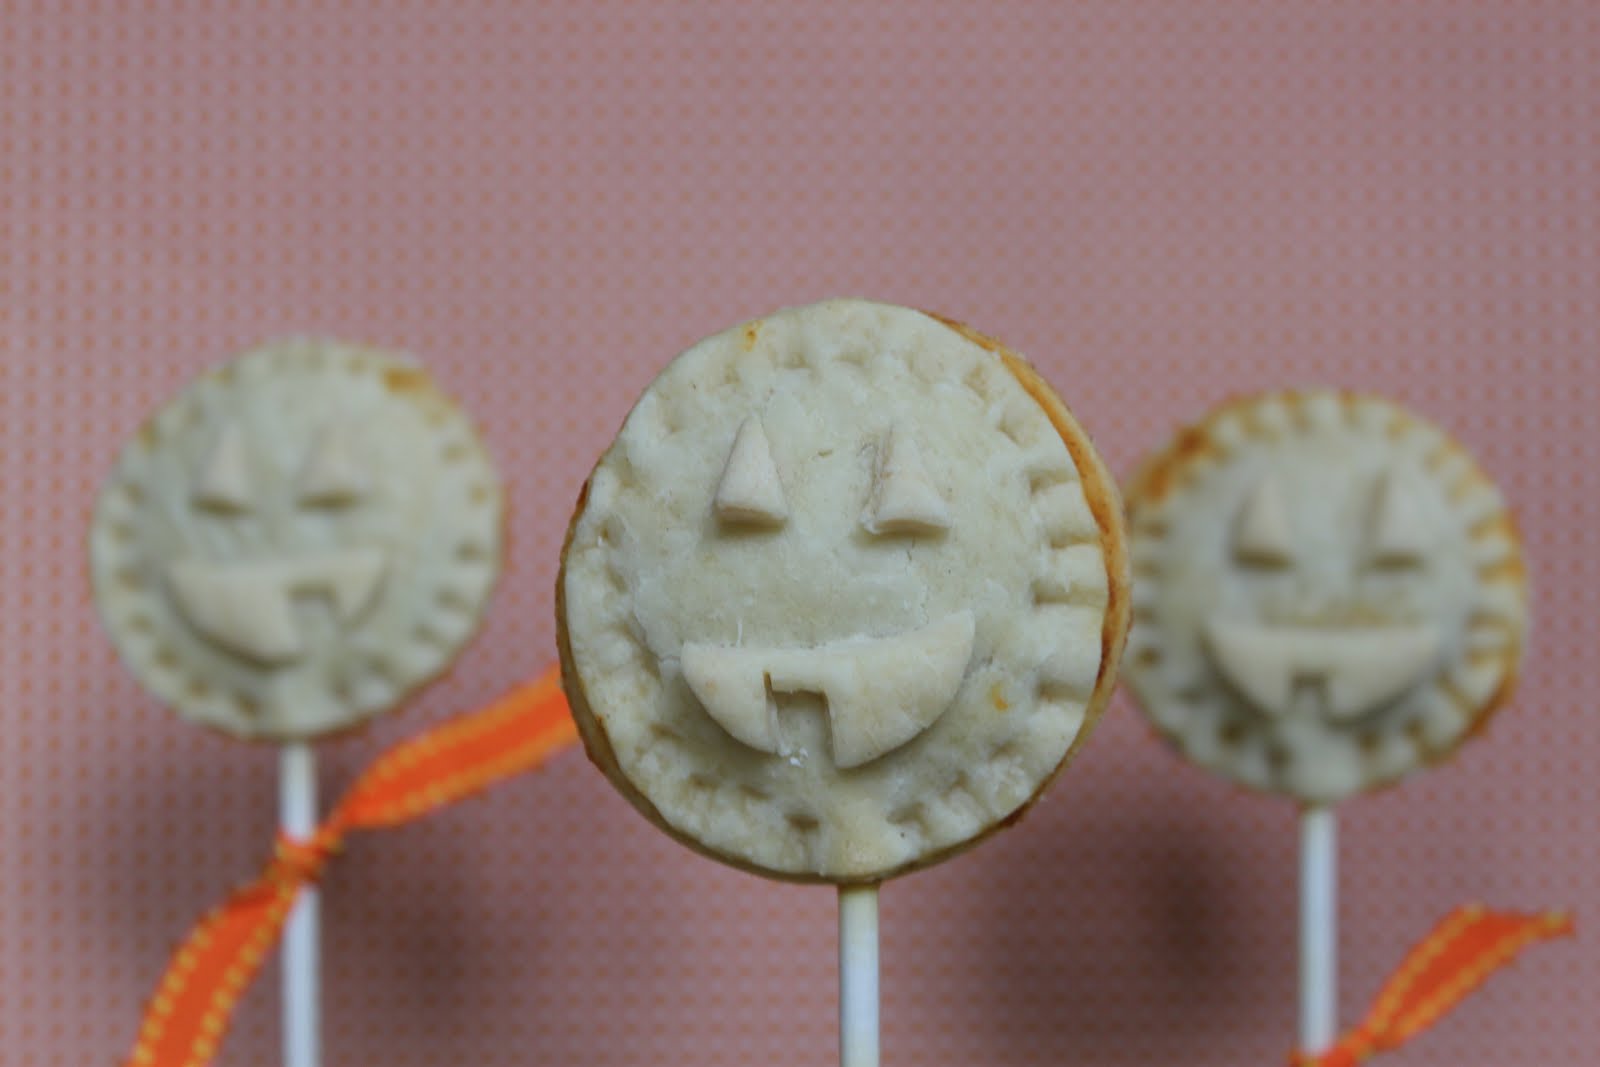
Use your excess pie dough to create some pumpkin faces, the kids will go crazy over these! Pop these babies into the oven to bake and then it's time to eat pie!

You can dress up the pie pops with some colored ribbon!

Pumpkin Pie Pops (makes 32)

Ingredients:
-2 boxes Pillsbury refrigerated pie crusts (4 crusts)
-1 cup pumpkin puree (not pumpkin pie mix)
-1/2 tsp cinnamon
-1 egg
-1/4 cup sugar
-1 egg white, set aside for brushing tops of pies

  • Preheat oven to 350 degrees.
  • Roll out pie crusts, using circle cutter make circles for top & bottom of pies.
  • Combine pumpkin, cinnamon, egg and sugar in a bowl and mix.
  • Place pie circles on baking sheet, evenly spaced apart for baking.
  • Place small dollop of pumpkin pie mixture on pie crust.
  • Place lollipop stick on top of mixture.
  • Place another circle of pie crust on top to seal the pie.
  • Using the tip of a lollipop stick gently press around the edge of the pie circle to seal the top and bottom crusts together.
  • Brush tops of pies with egg white.
  • Using extra dough cut out pumpkin faces and stick on mini pies.
  • Bake for 15 minutes or until light golden brown.
ENJOY!

Sunday, October 31, 2010

Happy Halloween!

Happy Halloween! Hope you have a fun-filled day with lots of treats! Here's a festive recipe of my latest cake creation, a Chocolate Pumpkin Cake with Orange Cream Cheese Frosting and Chocolate Ganache Glaze....it sure is a mouthful but it is oh so yummy and worth every single calorie!


Chocolate Pumpkin Cake (makes one 3-layer cake)

Ingredients:
-2 1/2 cups all-purpose flour
-1 cup granulated sugar
-1 cup dark brown sugar
-3/4 cup cocoa powder
-1 1/2 tsp baking soda
-2 tsp baking powder
-1 tsp salt
-2 tsp cinnamon
-1 1/2 cups buttermilk
-1 cup pumpkin puree (not pumpkin pie mix)
-1 cup vegetable oil
-1 tsp vanilla
-3 eggs

  • Preheat oven to 350 degrees.
  • Prepare three 8" cake pans lined with parchment paper and sprayed with cooking spray.
  • In a large bowl combine all dry ingredients: flour, sugars, cocoa powder, baking soda, baking powder, salt, cinnamon and mix together.
  • In a medium bowl combine all wet ingredients: buttermilk, pumpkin puree, vegetable oil and vanilla.
  • Add wet ingredients to dry ingredients and beat with mixer on medium speed just until combined.
  • Add eggs one at a time, beating well after each addition.
  • Pour batter evenly into prepared pans.
  • Bake for 25 minutes or until cake tests done.
  • Let cakes cool in pans for 10 minutes then move to wire racks to continue cooling.
  • While cakes are cooling you can prepare the Orange Cream Cheese Frosting.
Orange Cream Cheese Frosting

Ingredients:
-12 oz cream cheese, softened
-1 1/2 sticks unsalted butter, softened
-6 cups confectioner's sugar
-1/2 tsp vanilla
-orange food coloring

  • Mix cream cheese and butter with electric mixer on medium speed until creamy.
  • Gradually add in confectioner's sugar one cup at a time and continue to mix.
  • Mix in vanilla.
  • Add in orange food coloring and mix until you reach your desired shade of orange.
  • Once cake has cooled, ice your cake with cream cheese frosting and then place cake in refrigerator for about 20 minutes so icing will set up.
  • Prepare the Chocolate Ganache while you wait.
Chocolate Ganache

Ingredients:
-1 cup heavy cream
-8 oz semi-sweet chocolate chips

  • In a small sauce pan heat heavy cream over medium-high heat until it comes to a boil.
  • Remove cream from heat and pour over chocolate chips.
  • Gently stir cream and chocolate chips so chocolate begins to melt.
  • Let mixture sit 5 minutes and then stir. Mixture will begin to thicken as it sits.
  • Remove cake from refrigerator and pour Chocolate Ganache overtop of the cake and gently push it over the sides using an offset spatula so that it drizzles down.
This cake is perfect to take to a Halloween or Fall party and I guarantee it won't last long!

Happy Halloween!

Friday, October 1, 2010

Cupcake a Week: Pumpkin Skewers

Happy October 1st! I can't believe it's already time to start thinking about pumpkin flavored sweets, Halloween costumes and the crazy amounts of candy that comes along with this month!

To start the month off right I'm excited to share with you another cupcake skewer idea I submitted to the Pizzazzerie contest last week! The winner has been chosen, and although my skewers didn't win, both my Cute as a Button and this Pumpkin Skewer idea were featured on the Pizzazzerie site! Be sure to check out some of the other great submissions over on their website for some Halloween and everyday cupcake skewer inspiration. I was so excited when I saw pictures of my cupcake creations!
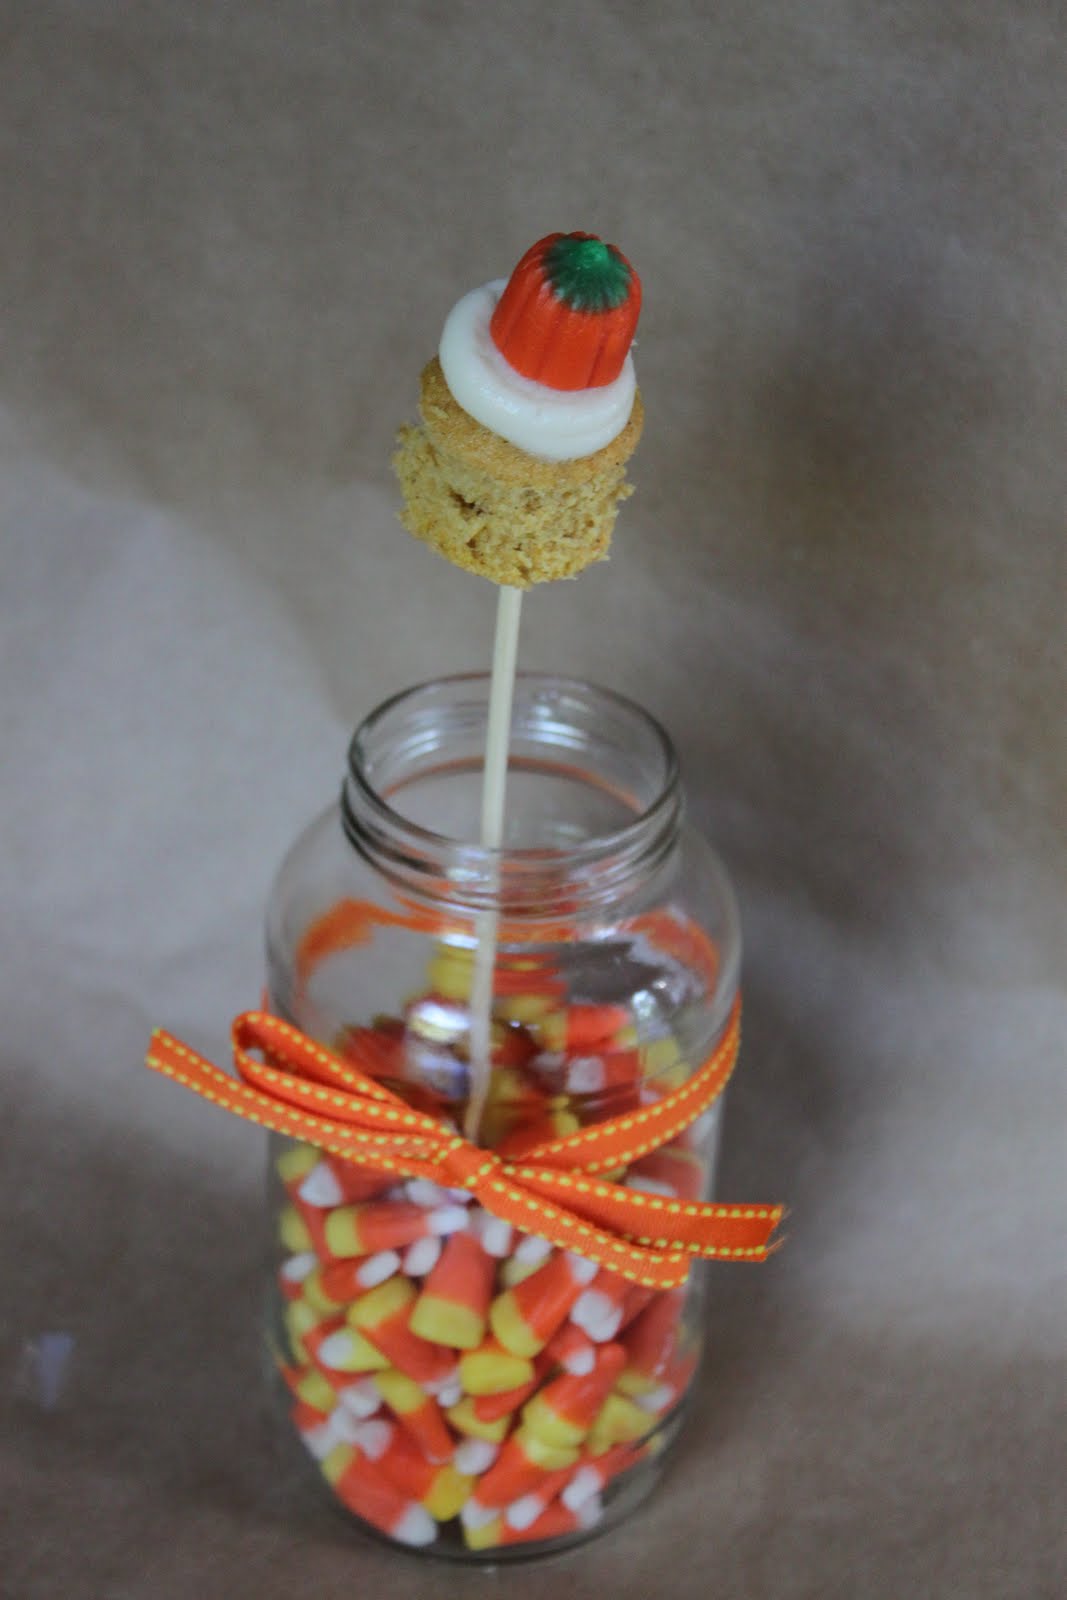
For this round of cupcake skewers I made a batch of pumpkin cupcakes with cream cheese frosting.

Then decorated the tops with a signature Fall pumpkin candy! These make cute mini cupcakes, but to make the actual cupcake skewer, before decorating there is an extra step you need to do first. So, as promised from last week's cupcake skewer post, I'm going to show you step-by-step how to put your mini cake on a stick!

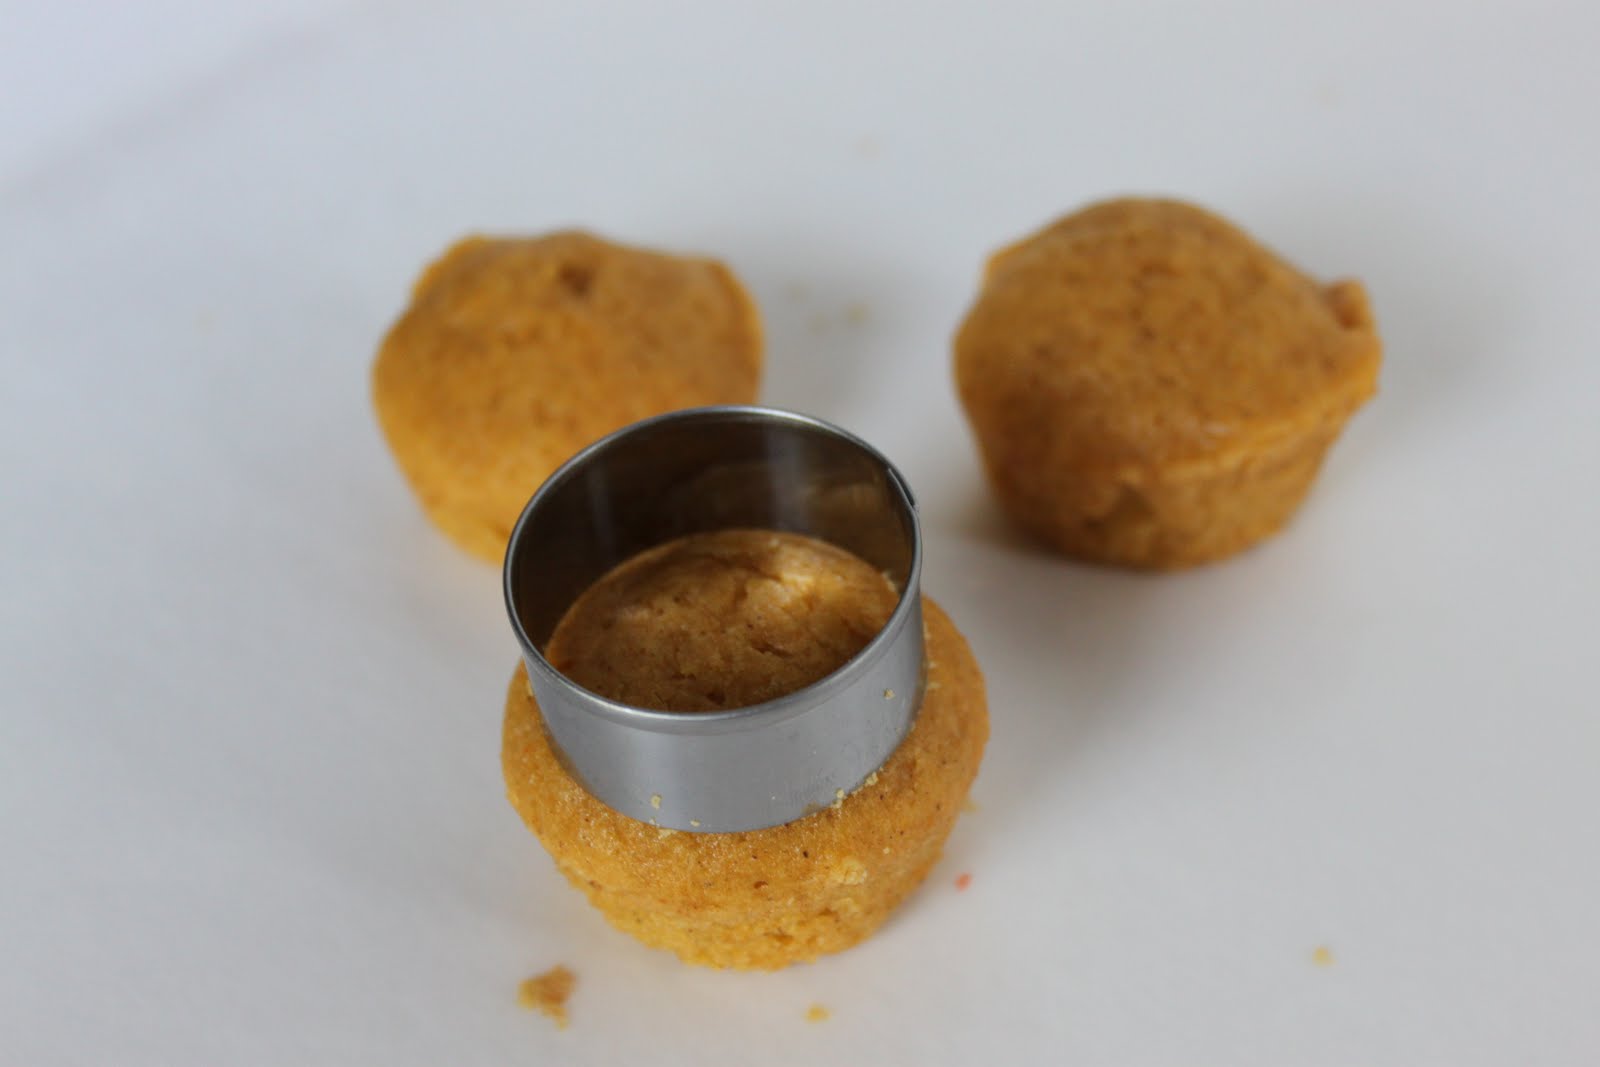
First make a batch of mini cupcakes and remove the paper liners. Use a circle cutter that is slightly smaller than the width of your cupcake and press through the center of the cake.

Remove the excess cake from around the edges.

You are now left with a uniform round cupcake shape. Cutting the cupcakes with a small circle cutter ensures that all cupcakes are the same size and removes some of the weight of the cake so it sticks on the skewer better. Trust me, I learned this the hard way by first placing the entire mini cupcake on the skewer, the cake was too heavy and flimsy and the skewer poked right through the top of the cupcake. This was bad, very very bad!

Then add a dollop of icing on top.

Add a pumpkin candy for decoration! This just screams fall to me! These are cute enough to eat, even without the skewer!

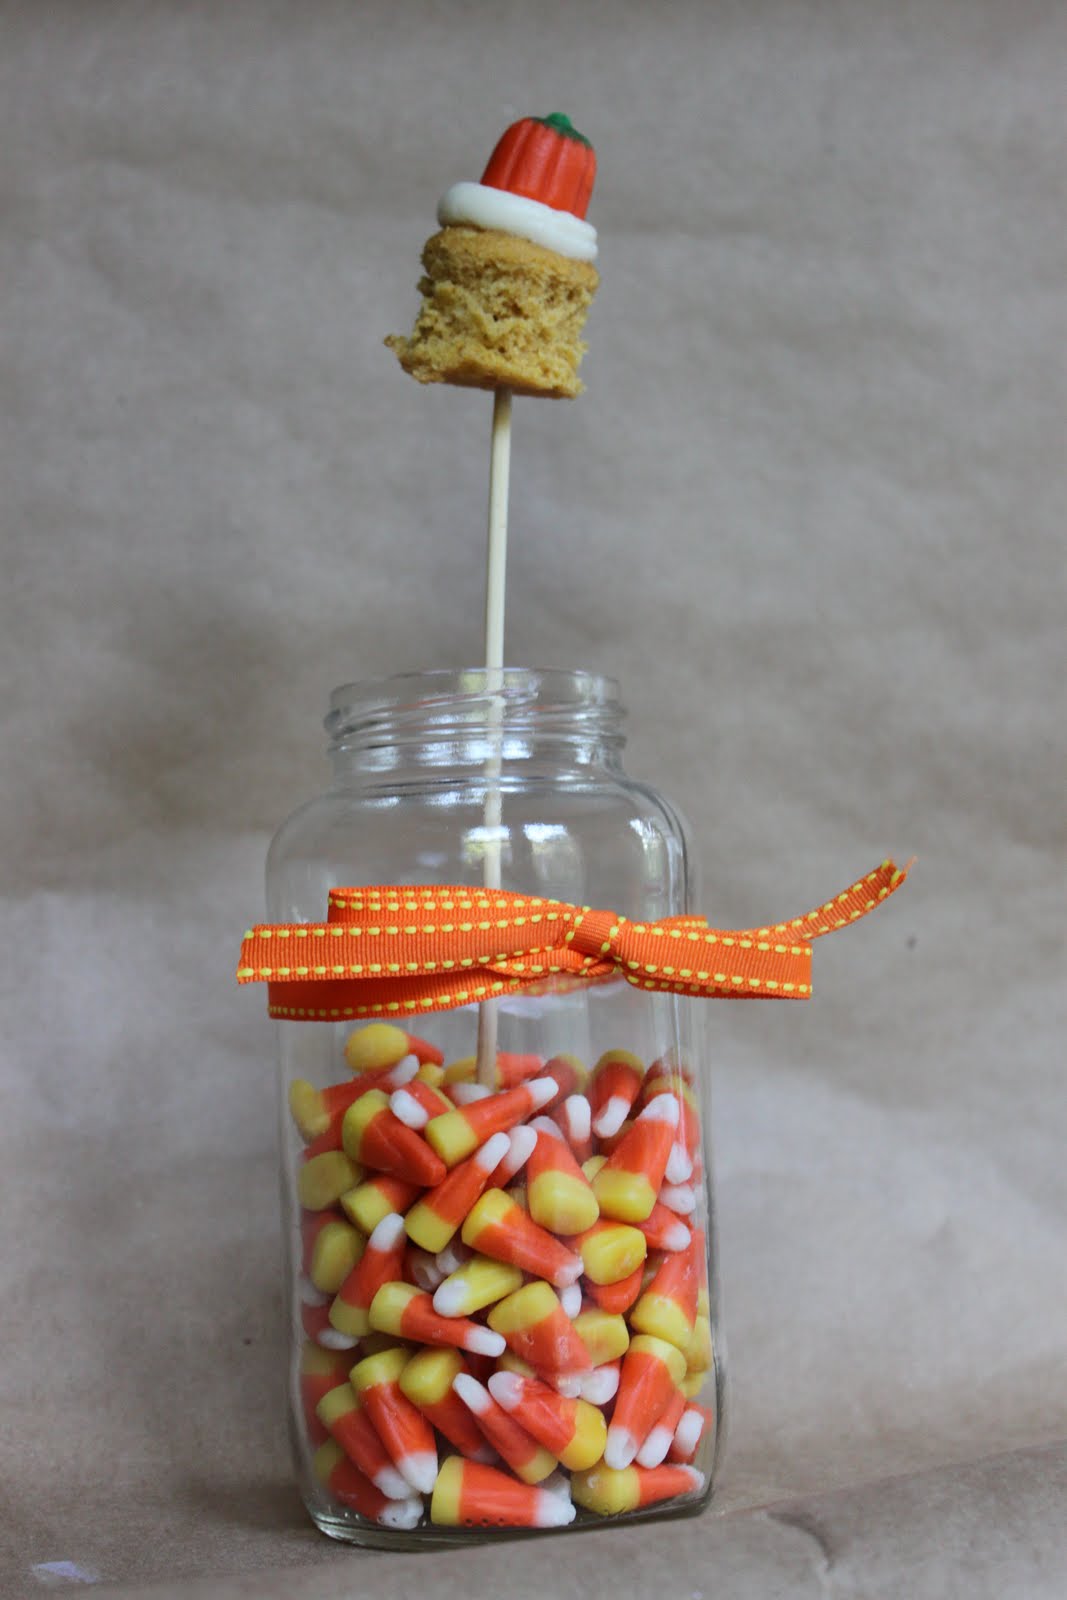
Place a wooden skewer in the base of the cupcake and viola!

Since candy corns are a staple candy at pretty much every house around Halloween I thought it would be a fun idea to include it in the presentation for these cupcake skewers. By simply using a glass jar, filling it with candy corn and tying a coordinating ribbon around the outside you have a super cute, easy, affordable and festive DIY display for any Halloween dessert table or party center piece.

I'm looking forward to sharing more fun fall and Halloween treats with you! If you have any exciting baking projects lined up for October I'd love to hear about them!

Happy October!

Wednesday, November 18, 2009

Pumpkin Roll


Well it has been a few days since I have shared some baking with you so I figured it was time to give you all another fall recipe...and guess what, it involves pumpkin again! For those of you that love pumpkin, this is a really fun idea! For those of you that do not like pumpkin, I'm sorry but my pumpkin cravings are still not out of my system, I think I still have a few more pumpkin recipes left to share, so hold tight, I promise there will be more recipes coming soon that don't involve pumpkin as the main ingredient.

I have had a pumpkin recipe poll on my blog for the month of November and so far only one person, has voted that a Pumpkin Roll is their favorite pumpkin recipe. So whoever you are out there that enjoys the Pumpkin Roll this recipe is for you!

As I sit here typing this post I am enjoying a piece of the pumpkin roll right now, and let me just tell you I have counted 9 layers of pumpkin cake and cream cheese frosting all rolled up together...simply delicious! This was my first time ever making a pumpkin roll so who better to turn to than Libby's, you know the maker of the canned pumpkin you find at the grocery. If you are intimidated by making the pumpkin roll, don't be, Libby's website has the recipe and a step-by-step instructional video from start to finish for this traditional fall desert. This is a super easy and quick recipe!

ENJOY!

Friday, November 13, 2009

Streusel In-Between Pumpkin Cake


You are all in for a treat...this is my all-time favorite pumpkin recipe! I have made this pumpkin streusel cake every November for the last four years. I first discovered this recipe in the Betty Crocker Fall Baking magazine at the end of the grocery checkout isle. I am excited to share this recipe with you since Thanksgiving is only a few weeks away. This would be the perfect dessert to compliment your turkey dinner.


The most delicious part about this cake is the streusel layer in the middle. Look at how ooey gooey this ribbon of brown sugar and cinnamon looks, it just melts in your mouth with each bite.

Streusel In-Between Pumpkin Cake (Betty Crocker)

STREUSEL
1/2 cup packed brown sugar
2 tablspoons all-purpose flour
1 teaspoon ground cinnamon
1/4 teaspoon pumpkin pie spice
1 tablespoon butter or margarine, softened

CAKE
3 cups all-purpose flour
2 teaspoons baking soda
1 tablespoon ground cinnamon
1 teaspoon salt
1 cup butter or margarine, softened
2 cups granulated sugar
4 eggs
1 cup canned pumpkin (not pumpkin pie mix)
1 cup sour cream
1 teaspoon vanilla
Powdered sugar, if desired

  • Heat oven to 350 degrees. Grease 12-cup fluted tube cake pan with shortening; lightly flour. In small bowl, stir all streusel ingredients until crumbly, set aside.
  • In medium bowl, mix flour, baking soda, cinnamon and salt; set aside. In large bowl, beat butter and granulated sugar with electric mixer on medium speed, scraping bowl occasionally, until creamy. Add eggs, two at a time, beating well after each addition. Beat in pumpkin, sour cream and vanilla. Gradually beat in flour mixture on low speed until blended.
  • Spread half of the batter in pan. Sprinkle streusel over batter, making sure streusel does not touch side of pan. Top with remaining batter, making sure batter layer touches side of pan.
  • Bake 58 to 62 minutes or until toothpick inserted in cake comes out clean. Cool 30 minutes; remove from pan to cooling rack. Cool completely, about 2 hours. Sprinkle with powdered sugar.
  • Makes 16 servings.

ENJOY!


Tuesday, November 10, 2009

Pumpkin Cupcakes with Cream Cheese Frosting and Salted Caramel Sauce


As promised, the month of November will be dedicated to a lot of pumpkin recipes...so get ready this is one you definitely need to try...Pumpkin Cupcakes with Cream Cheese Frosting & Salted Caramel Sauce...wow that is a mouthful...but a very delicious mouthful once you bite into one of these delicious treats.


Pumpkin Cupcakes with Cream Cheese Frosting (recipe from www.recipegirl.com)

CUPCAKES:
2 cups flour
2 tsp baking powder
1 tsp ground cinnamon
1/4 tsp ground nutmeg
1/4 tsp ground ginger
1/4 tsp salt
1/2 cup vegetable oil
1 1/4 cups granulated sugar
2 large eggs
1 tsp vanilla extract
1 cup canned pure pumpkin

CREAM CHEESE FROSTING:
3 cups powdered sugar (more if you intend to pipe it on)
8 oz package cream cheese, softened
4 tbsp butter, softened
1 tsp fresh lemon juice

  • Preheat oven to 350 degrees. Line a 12 cup muffin pan (or a 24 cup mini muffin pan) with baking cups.
  • In a large mixing bowl, stir together flour, baking powder, cinnamon, nutmeg, ginger and salt. Set aside.
  • In a separate bowl, stir oil and sugar together. Whisk in eggs, and stir in vanilla extract.
  • Pour wet ingredients over dry ingredients and stir until just combined. Stir pumpkin into the batter until it is thoroughly combined.
  • Spoon batter into lined muffin cups. Bake for 20 minutes, or until a knife inserted in the middle of a cupcake comes out clean. Less time will be needed if you are making mini-cupcakes. When cupcakes are removed from oven, let them sit for about 10 minutes, then remove them to cool completely on wire rack.
  • Meanwhile prepare the cream cheese frosting: In a medium bowl beat together all ingredients.

I used a #1 Wilton decorating tip and a piping bag to swirl on the icing.


Cupcakes ready to be drizzled with the Salted Caramel Sauce.


Salted Caramel Sauce (recipe www.chow.com)

1 cup granulated sugar
4 tablespoons unsalted butter (1/2 stick)
1/2 cup heavy cream
1/2 tsp kosher salt

  • Stir together sugar and 1 tablespoon water in a small saucepan, place over medium-high heat, and bring to a boil. Let boil until amber in color, about 3 minutes.
  • Immediately add butter and stir to incorporate. Remove from heat, add cream and salt, and mix well. Serve immediately or let cool to room temperature, cover and refrigerate.


What you are looking at above is a picture of a "bondi band", basically it is headband to wear while you are running to keep the sweat or hair out of your face, it can also double as an ear warmer when the weather is colder. I first discovered "bondi bands" this May when I was in San Diego running the Rock N' Roll Marathon. At the race expo the day before the event, there was a vendor set up selling these headbands...and the moment I saw the one that says "will run for cupcakes" I was SOLD, I knew I had to get this! As long as I can remember I have always enjoyed eating cupcakes, they are just so cute and the perfect size indulgence to satisfy your sweet tooth cravings! So I'm guessing you are now starting to see where the name for my blog and my profile name "I Run for Cake" came from. I was so excited when I bought this headband and apparently was a little too hyper the rest of the weekend...all the other runners I was doing the marathon with kept calling me "bondi band, bondi band, bondi band" all weekend long! They actually still do to this day as well.


So now that you know the story behind my bondi band, here is the story about this amazing cupcake plate above. One of the guys, Thomas, who to this day still gives me a hard time about my bondi band excitement got me this plate. I was Thomas' mentor through our marathon training so as a thank you to helping him with his fundraising him and his wife Katie bought me this super cute cupcake plate. I absolutely love this piece and used it for the first time this past weekend when Katie and Thomas had us over for game night!


I just realized that as I am typing this post I have on my "will run for CUPCAKES" bondi band..I just got back from track practice a little while ago and wore it while I ran tonight! I love this headband!

Wednesday, October 14, 2009

Pumpkin Cranberry Cookies


In my mind, Fall = PUMPKIN....lots and lots of pumpkin! This will be the first of many pumpkin flavored recipes that I plan on posting between now and Thanksgiving. So get ready to see all the different types of sweet treats that you can create with pumpkin.


I absolutely love these pumpkin cranberry cookies! There are so many great flavors and ingredients jam packed into these delicious treats. The combination of cinnamon, ginger and nutmeg create such a pleasant fall aroma throughout the house as these cookies bake in the oven.


Then when you bite into these cookies you get the texture of the dried cranberries and the oatmeal. YUM! These cookies are so fluffy and moist...almost the consistency of a muffin or bread...they are not crunchy or gooey like your typical cookie. Is your mouth watering yet?


These cookies would be perfect to take to a holiday party, a cookie swap or just to have as an after dinner dessert, as we did tonight!

Pumpkin Cranberry Cookies

Ingredients:
12 tbsp butter, softened
1 cup packed brown sugar
1/2 cup sugar
1 cup canned pumpkin
1 egg
1/2 tsp vanilla extract
1 1/2 cups all-purpose flour
1 cup quick cooking oats
1/2 cup whole wheat flour
1 tsp baking soda
1/2 tsp ground ginger
1/2 tsp ground cinnamon
1/4 tsp salt
1/4 tsp ground nutmeg
1/2 cup dried cranberries

Cream butter and sugars until light and fluffy. Beat in pumpkin, egg and vanilla. Combine all-purpose flour, oats, whole wheat flour, baking soda, ginger, cinnamon, salt, nutmeg; gradually add to creamed mixture. Fold in cranberries. Spray baking sheet with cooking spray. Drop dough by large spoonfuls two inches apart. Bake at 350 degrees for 20-22 minutes. Makes 1 dozen cookies.

Hope you enjoy this recipe as much as I do!
Related Posts with Thumbnails