Friday, July 30, 2010

Cupcake a Week: Cupcakes for a Cure, Part 1

The big weekend is here! The Cupcakes for a Cure tasting that I've been advertising on my blog sidebar is this Sunday! This event really has potential to be a huge success as we were featured in the newspaper this week...YEAH! Those are pictures of my cupcakes on the front page of the living section, how cool is that!

As you all know I love to bake & decorate cupcakes and I have been dreaming up a way to be able to do just that and raise money for a great cause all at the same time. Well this weekend it is going to happen! I have teamed up with three other ladies and together the 4 of us are going to hopefully raise a lot of money for the Leukemia & Lymphoma Society. I'm the "coach" and "baker" of our 4 person team. I coach for Team in Training and as a way to help out 3 of the participants who are currently training and fundraising for the Nike Women's Marathon in October I have offered to turn my kitchen into a cupcake bakery for a day and crank out 1000 cupcakes!

There has been a lot going on this week in preparation for the big event so instead of sharing with you a new recipe I'm going to give you a behind the scenes sneak peak at how the event is coming together.

This is the venue where the cupcake tasting will take place. One of the girls that is fundraising teaches at a catholic school in Mobile and had a connection to one of the buildings on the campus for us to use. How cute are those chairs...they remind me of a little cafe bistro.

This is the front of the room that we are going to use to set up our cupcake dessert table featuring 5 varieties. Featured flavors are: Vanilla with Vanilla Buttercream, Chocolate with Peanut Butter Frosting, Chocolate Chip, Jammin' Strawberry Cream & Chocolate and Lemon Blueberry.

There will be door prizes given away every 10 minutes of this 2 hour event...here are a few, a cupcake book and some baking mats for kids.

Lots of cupcake liners. We have chosen to bake minis for the tasting and each flavor will be baked in a specific color wrapper.

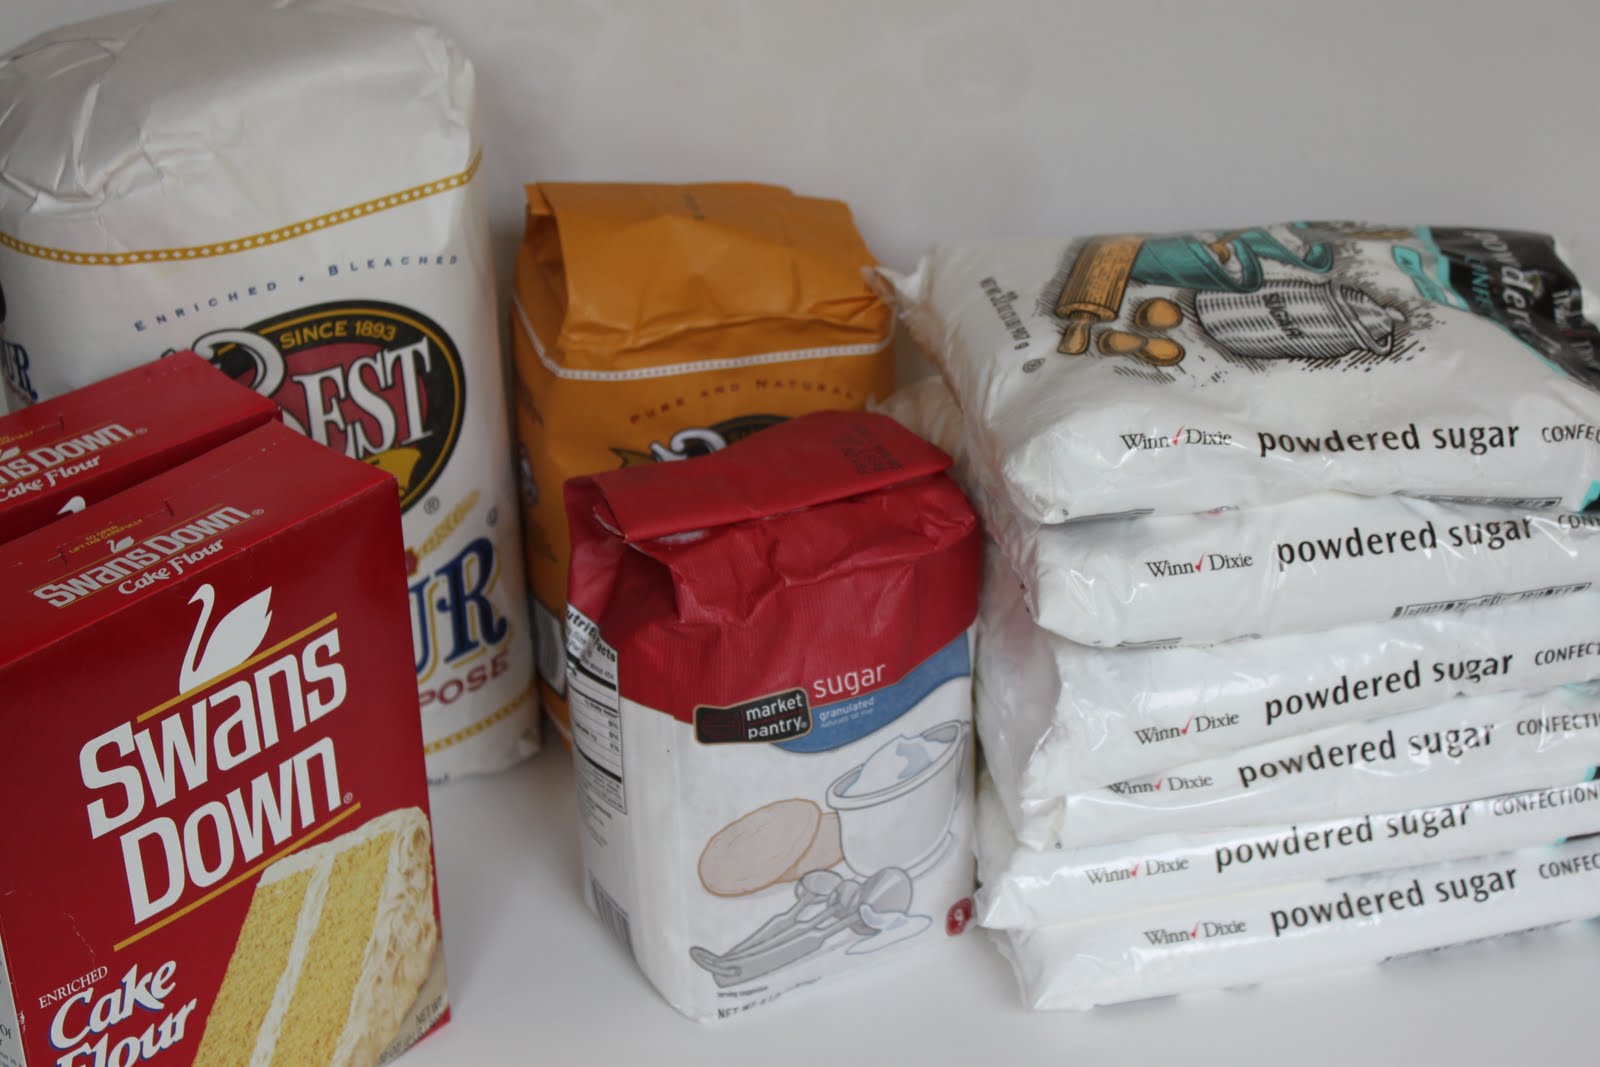
Here's only a glimpse of some of our cupcake ingredients. Thanks to a lot of the local grocery stores in Mobile we were able to get all of our ingredients donated, so that means all money raised at the door is 100% profit and goes directly to the Leukemia & Lymphoma Society!

I've done the math and I figure I can fit 48 minis in my oven at a time. So to get 1000 mini cupcakes that means about 21 batches of baking and between 4-5 hours of oven time!

We are going to add some color to the cupcake display table using these cloth paisley print napkins. We plan to display the cupcakes on a variety of white and glass cake pedestals to create a shabby chic look for the day.

So tomorrow starts the big bake-a-thon and will definitely be a test of endurance in the kitchen! Luckily Katie, Wendy and Jennifer have volunteered to come over and help me out, so together the 4 of us should be able to conquer the cupcakes!

Be sure and check back next week when I post all the details and photos of the actual event!

Tuesday, July 27, 2010

Peanut Butter & Chocolate Chip Ice Cream

Well summer seems to be flying right on by and this is the first time I have made homemade ice cream! What have I been waiting for! I decided it was finally time to break out the old ice cream maker and whip up a nice cool treat for after dinner dessert since July is National Ice Cream Month. I am a huge ice cream fan, I love all flavors, especially the ones with chocolate and chunks of stuff whether it be nuts, chocolate chips, cookie dough, or candy bars.

Recently I discovered a Peanut Butter Chocolate Chip Ice Cream from Heather at Multiply Delicious. I first found Heather's blog when I entered the Real Women of Philadelphia Competition and submitted my recipe for Jammin' Strawberry Cream & Chocolate Cupcakes. During the competition I discovered so many amazing blogs by women who love to bake and cook all over the country and I have been following several of them ever since. I just love getting recipe ideas and inspiration from other blogs.

I am so excited about my latest find at TJMaxx...this set of 4 ice cream bowls & spoons in fun vibrant summery colors for only $4.99. What a steal! I love shopping around for fun props to display my food in and TJMaxx is a great go to place for unique and cheap items. These bowls were absolutely perfect for serving up this batch of ice cream!

So if you are looking for a fun summer ice cream recipe that doesn't take much prep time this is a delicious recipe and sure to be a crowd favorite!

Peanut Butter & Chocolate Chip Ice Cream (adapted from Multiply Delicious)

-1/2 cup creamy peanut butter
-1/2 cup granulated sugar
-1/2 cup light brown sugar
-2 cups heavy cream
-1 1/2 cups milk
-1 1/2 tsp vanilla
-3/4 cup chocolate chips

  • With an electric mixer beat peanut butter and sugars until creamy.
  • Add milk and mix for 1-2 minutes.
  • Mix in heavy cream and vanilla extract.
  • Pour mixture into the bowl of an electric ice cream maker. (I have this Cuisinart ice cream maker)
  • Follow the directions on the ice cream maker and cream mixture for about 25-30 minutes.
  • In the last 5 minutes of mixing, stop the ice cream maker, stir in the chocolate chips.
  • Turn ice cream maker back on and continue mixing for 5 minutes.
  • Ice cream will be the consistency of soft serve and will be ready to eat right away.
  • For a more firm consistency ice cream transfer the batch to a plastic container and place in the freezer for a few hours or overnight.
Are you planning on making some homemade ice cream this summer? I'd love to hear what your favorite flavor is!

Friday, July 23, 2010

Cupcake a Week: Chocolate Chip Cookie Dough Ice Cream Cones

I scream, you scream, we all scream for ice cream! Ice cream cone cupcakes that is!

The temps here in Mobile are HOT right now...I mean close to 100 degrees HOT...with a heat index of 110 degrees HOT. So what better way to enjoy these toasty summer months than to cool off with a nice ice cream cone. Luckily the cone I have created for you today, is one that will not melt during these scorcher days b/c this cone does not have ice cream, although it sure does appear to. I have created an ice cream cone look-a-like made from cupcakes and frosting.

I'm so excited to show you how to make these super cute cupcake cones featuring one of my favorite ice cream flavors chocolate chip cookie dough as a cupcake! We will get to the cake and frosting recipes in a bit but first I want to show you how to assemble these cones from start to finish.

You will need a box of 12 sugar cones, a batch of mini cupcakes and a batch of frosting. Feel free to use whatever your favorite flavor is.

1.Spread some frosting inside the top of the cone all around the edges with a spatula.


2.Place a mini cupcake inside the cone. (the icing around the edges will allow the cupcake to fit securely in the cone and not fall out)


3.Spread a thin layer of icing on top of the mini cupcake.


4.Place a 2nd cupcake upside down on top of the icing and the 1st cupcake. Place cupcake cone in fridge for about 10 mins to firm up so it is easier to ice the cupcakes without the top cupcake falling off.


5.Cover the cupcakes in a layer of frosting.

6.Take a bite and enjoy your cupcake cone!

These cones look like the real deal and the best part is, they will not melt.

I am already envisioning other flavors or even multiple flavor combinations that I could make for another batch of these. Wouldn't these be fun to take to an ice cream themed party this summer! You could tie a cute ribbon around the cones and add a name tag for each of your party guests and give them out as favors. Or you could create a wrapper around them with some fun scrapbook paper to match the colors of your party. I'm definitely going to revisit the cupcake cone concept again in the near future, there are just so many possibilities to customize your cone!


Chocolate Chip Cookie Dough Ice Cream Cupcakes

Makes 12 cones

Brown Sugar Chocolate Chip Cupcakes (makes 24 minis)
-3/4 cup unsalted butter, room temperature
-3/4 cup light-brown sugar
-2 eggs
-1 1/3 cups all-purpose flour
-1/2 tsp baking powder
-1/2 tsp baking soda
-1/4 tsp salt
-1/2 cup milk
-1 tsp vanilla
-1/2 cup chocolate chips

  • Preheat oven to 350 degrees. Line mini cupcake pan with paper liners.
  • Beat butter and sugar with electric mixer on medium until creamy.
  • Add eggs one at a time, beating after each addition.
  • Whisk together flour, baking powder, baking soda and salt in a bowl.
  • Combine milk and vanilla.
  • Add flour and milk mixture to batter alternating, by starting and ending with flour.
  • Stir in chocolate chips.
  • Fill cupcake liners about 1/3-1/2 full with batter.
  • Bake for 12-14 minutes.
  • Cool cupcakes on wire rack.
Eggless Cookie Dough (will be used in the frosting)
-1/4 cup unsalted butter, room temperature
-1/4 cup brown sugar
-2 teaspoons water
-1/2 teaspoon vanilla
-1/2 cup flour
-1/4 cup mini chocolate chips

  • Cream butter and sugar in bowl with electric mixer.
  • Add water and vanilla and mix.
  • Add flour and mix.
  • Stir in mini chocolate chips.
  • Refrigerate dough until ready to use.
Chocolate Chip Cookie Dough Frosting
-1/2 cup unsalted butter, room temperature
-1 3/4 cup confectioners' sugar
-1/2 teaspoon vanilla extract
-1 tablespoon milk
-1/2 - 1 cup Eggless Cookie Dough (depending on the texture you want)

  • Cream butter in bowl with electric mixer until creamy.
  • Gradually add in confectioners' sugar and mix.
  • Add vanilla and milk and continue to mix.
  • Add in eggless cookie dough and mix until well combined.
  • Frost cupcake cones.
Hope you enjoy these fun summer treats! Let me know if you decide to make these with a different flavor, I'd love to hear what you come up with!

Have a great weekend!

Tuesday, July 20, 2010

Pink, Orange & Yellow

Pink...Orange...Yellow
Fun Vibrant Colors
Be creative, no expectations
Square cake
Flavors: Yellow with Oreo cream cheese filling
Needs to transport a couple of hours in the car (uh oh...I've never made a traveling cake before)
Happy 25th Birthday Erin

These were the instructions I was given for one of my latest cake decorating adventures.

So I started off with a 50/50 mixture of gumpaste and fondant. I tinted the mixture 3 colors: pink, orange & yellow and then cut out circles of 3 different sizes.

Next I used a toothpick and rolled it around the edge of all of the circles to create a ruffled look.

All 3 circle sizes are ruffled and ready for layering. Any ideas as to what the final cake will look like?

Tada! The final cake! I thought it would be fun to create ruffled flowers all the same color and then some using the 3 color combo for variety.

Since the cake shape was square I thought an alternating orange & yellow square border would work well along the edge with a dab of pink buttercream in the center of each square.

Keeping with the square theme around the base, I decided to write the birthday message on squares on top of the cake. It kind of gives the cake a "scrabble" like feel.

Erin actually ordered this cake for herself to take home and share with her family for her birthday over the 4th of July weekend! I hope everyone enjoyed the cake!

Sunday, July 18, 2010

Tortuga Rum Cake

Let me introduce you to what may just be my new favorite cake recipe...Tortuga Rum Cake! I am not a rum fan, nor really an alcohol fan for that matter but one bite of this and I think I can tolerate a little bit of rum in this cake! When Randolph and I were on our cruise last week we stopped in the Cayman Islands as one of our days at port. We took an excursion to Sting Ray City, Hell, the Turtle Farm and to the Tortuga Rum shop.


As we entered the Tortuga shop the shelves were lined with boxes of rum cakes in flavors like chocolate, coconut, banana, pineapple, key lime and their signature flavor original golden. They also had a wide variety of different flavors of rum you could sample and purchase.


And the best part of all...free samples! They had layer after layer of all the rum cake varieties. I sampled the original golden, chocolate, coconut and banana flavors. I literally ate at least 10 pieces of cake. These moist bite size cakes were simply irresistible.


This was my last round of samples. It was hard to drag myself out of the store. We actually lost track of time and ended up being the last people back on our tour bus because we were so busy tasting all the cakes. We didn't end up buying a rum cake, just because we didn't want to have to drag them around with us the rest of the day on our excursions. But now that I know these cakes exist I can always order them here on the Tortuga Rum Cake website. If you have never tried a rum cake check them out on the Tortuga site and order one today, you won't be disappointed. Or you can make your own rum cake from scratch using the recipe below.


Randolph bought a bottle of Appleton Estate rum from Jamaica and I got several varieties of vanilla from Mexico so I figured they would be the perfect ingredients when making the Tortuga Rum cake from scratch.


Not only is rum baked in the cake but then it is added into a sugar glaze and poured over the cake to soak in as the cake cools. Can you see how moist the left side of this piece of cake is, this is from the rum glaze. I actually didn't use as much rum as the recipe called for because I didn't want the flavor to be too overwhelming since it was being used in the cake and the glaze. You could definitely tell their was rum in the cake, but it wasn't too overpowering for those people who don't care for the rum taste.


This cake was a huge hit with Randolph's co-workers and our neighbors. If you are looking for a fun summer dessert then you definitely need to try this cake.

Tortuga Rum Cake (recipe adapted from Food.com)

Ingredients

Basic Cake Mix:
-2 cups cake flour
-1 1/2 cups granulated sugar
-4 teaspoons baking powder
-1 teaspoon salt
-1/2 cup butter
-3 tablespoons vegetable oil

For the Cake:
-1/2 cup finely chopped pecans (the original recipe calls for walnuts, but I didn't have them on hand)
-1 (3 1/2 oz) package vanilla instant pudding mix
-1/2 cup milk
-4 eggs
-1/3 cup rum (I used Jamaican Appleton Estate Rum)
-1/2 cup vegetable oil
-1 teaspoon vanilla extract (I used Mexican Vanilla Totonca's)

Rum Soaking Glaze:
-1/2 cup butter
-1/4 cup water
-1 cup granulated sugar
-1/3 cup rum (I used Jamaican Appleton Estate Rum)


  • Basic Cake Mix: In a large mixing bowl, combine basic cake mix ingredients.

  • On low speed combine ingredients until the mix is the consistency of fine gravel, and all particles are about the same size.

  • This mix may be contained and stored for up to 3 months in the refrigerator.

  • For the Cake: Preheat oven to 325 degrees.

  • Spray a large Bundt pan with nonstick cooking spray.

  • Sprinkle the chopped pecans on the bottom.

  • Place Basic Cake Mix, pudding mix, milk, eggs, rum, oil and vanilla extract in a large bowl and combine on medium speed with electric mixer for 2 to 3 minutes, scrape down the bowl halfway through.

  • Batter should be very smooth. Pour batter into Bundt pan.

  • Bake for about 55 minutes, until fluffy golden and tester comes out clean and cake springs back.

  • Remove from oven and place on a cooling rack while making the soaking glaze.

  • Rum Soaking Glaze: Combine butter, water and sugar in a small saucepan.

  • Bring to a boil carefully as mixture boils over very easily.

  • Reduce to a simmer and cook until sugar is dissolved and syrup is well combined and a little thicker.

  • Remove from the heat and add the rum, mix to combine.

  • While the cake is still cooling, pour some of the hot syrup on top of the cake, allowing it time to soak in (this may take a few minutes as there will be a lot of syrup) continue to add syrup until all of the syrup is added.

  • Allow cake to cool completely in pan before turning out onto serving platter.

  • This cake is delicate, so once it is turned out, it can not be moved around easily.

I'll leave you with a few pictures of our visit to the Turtle Farm and a little bit of Cayman Island history. Did you know that turtle is actual "tortuga" in Spanish? The Cayman Islands were originally called Las Tortugas when Christopher Columbus discovered them in 1503 and gave them their name because of the numerous amount of sea turtles he saw on the island. Later the islands were renamed the Cayman Islands after caiman the term for alligator when Sir Frances Drake landed in 1586 and saw a lot of alligators on the islands.


Friday, July 16, 2010

Cupcake a Week: Hello Kitty

What better way to start the weekend than with a Hello Kitty themed birthday party! I made these cupcakes for a little girl's birthday party for tomorrow. I'm sitting here typing this post as I wait for a mother to come pick up the cupcakes for her little girl. I know nothing about the little girl who will be eating these cupcakes tomorrow...what her name is, how old she will be, what her favorite color is..but I guess the one thing I do know about her is she likes Hello Kitty. So I hope these cupcakes bring her smiles and happiness on her birthday!


I was emailed a picture of this party plate and asked that the cupcakes be iced with different colored frosting to match the plate and to use some colored sprinkles. Pretty simple request, right? I thought it would be fun to take the design one step further and feature Hello Kitty on some of the cupcakes...afterall it is a Hello Kitty party!

So using some white rolled fondant I created the little kitty faces and then piped on the details with some buttercream.

Maybe her daughter will come with her to pick up the cupcakes and I will get to see the reaction on her face when she sees pink cupcakes covered with rainbow sprinkles. I know this would make me very happy if I was a little girl!

Cupcakes were just picked up and I found out more info about the birthday girl...her name is Lily and she is turning 5 tomorrow! Unfortunately I didn't get to meet Lily, but her mom absolutely loved the cupcakes!

Happy 5th birthday Lily!

Tuesday, July 13, 2010

Cruise Ship Desserts

So I just returned from a week long cruise to Jamaica, Cayman Islands and Cozumel. While on board the Carnival Elation I was so upset that I wouldn't be able to bake or blog for a week, that I figured the next best thing was to take pictures of some of the fantastic desserts we indulged in everyday!

This chocolate layer cake was the first sweet treat that was actually waiting for us as we arrived to our cabin. Jennifer, from our travel agency had ordered this cake for us, so sweet! It was a filled with layers of chocolate mousse. This cake was definitely a chocolate lovers dream!

Here's a slice of cheesecake with a side of whip cream and strawberry dipping sauce that we ordered from room service for dessert one night! This cheesecake was absolutely amazing! I actually ordered it a 2nd time on our last night on the ship after I had already eaten dessert in the main dining room...it was just that good I had to eat it one last time!

A slice of chocolate cake from room service! YUM YUM YUM!

This is the Chocolate Melting Cake which was hands down everyone's favorite dessert at our dining table. It is so popular that this was one of the desserts featured on the menu every single night. As you probably guessed, I ordered this one several times. Once you stick your spoon into the chocolate cake it just gushes with a moist and gooey center. Paired with a scoop of vanilla ice cream it is fabulous!

I can't remember the exact name of this dessert but it is some type of white chocolate bread pudding. Then a white chocolate sauce was added to make it extra special. This was one of my favorites. Randolph had actually ordered this as his dessert one night, but I ended up taking control of the fork and devoured it mostly for myself, it was just that good.

So as you can see, my sweet tooth was definitely satisfied and these were only the dinner desserts I ate every day. During lunch time I would also sneak several sweets from the dessert buffet, the chocolate chip cookies were amazing! On top of that, every afternoon around 3 o'clock I would go back to the buffet and get some chocolate & vanilla soft serve ice cream. It was definitely a nice, cold, refreshing treat after basking in the sun all day long!

Thanks Carnival Cruise for some awesome desserts all week long!
Related Posts with Thumbnails