Wednesday, September 8, 2010

Cupcake a Week: Hamburgers

I am a burger lover...the more toppings the better as far as my burger goes! So when I first came across the idea for hamburger cupcakes on Bakerella's blog last year I was completely blown away by her creativity. I have been dying to make these bite size burger cakes ever since but just haven't had the perfect opportunity until this past weekend.

A friend I run with was having a football party grill out fundraiser and asked if I would make her some hamburger cupcakes! Of course my response was YES! These cupcakes were so fun to make and were a huge hit at the party!

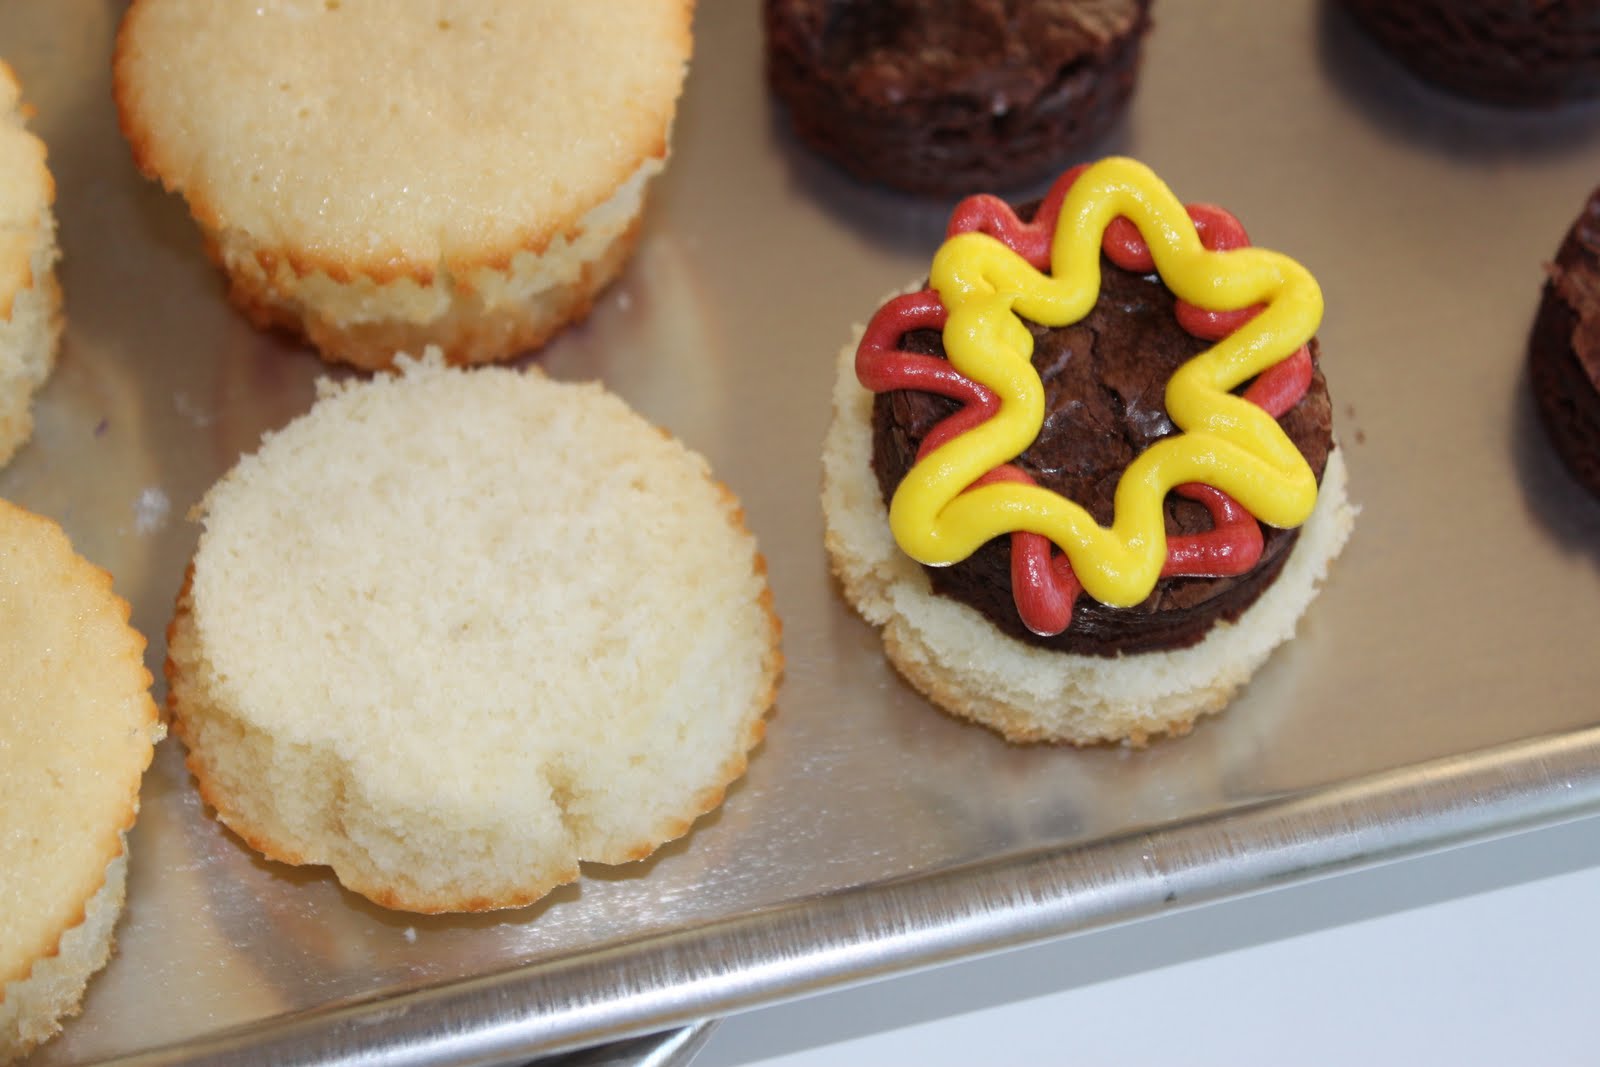
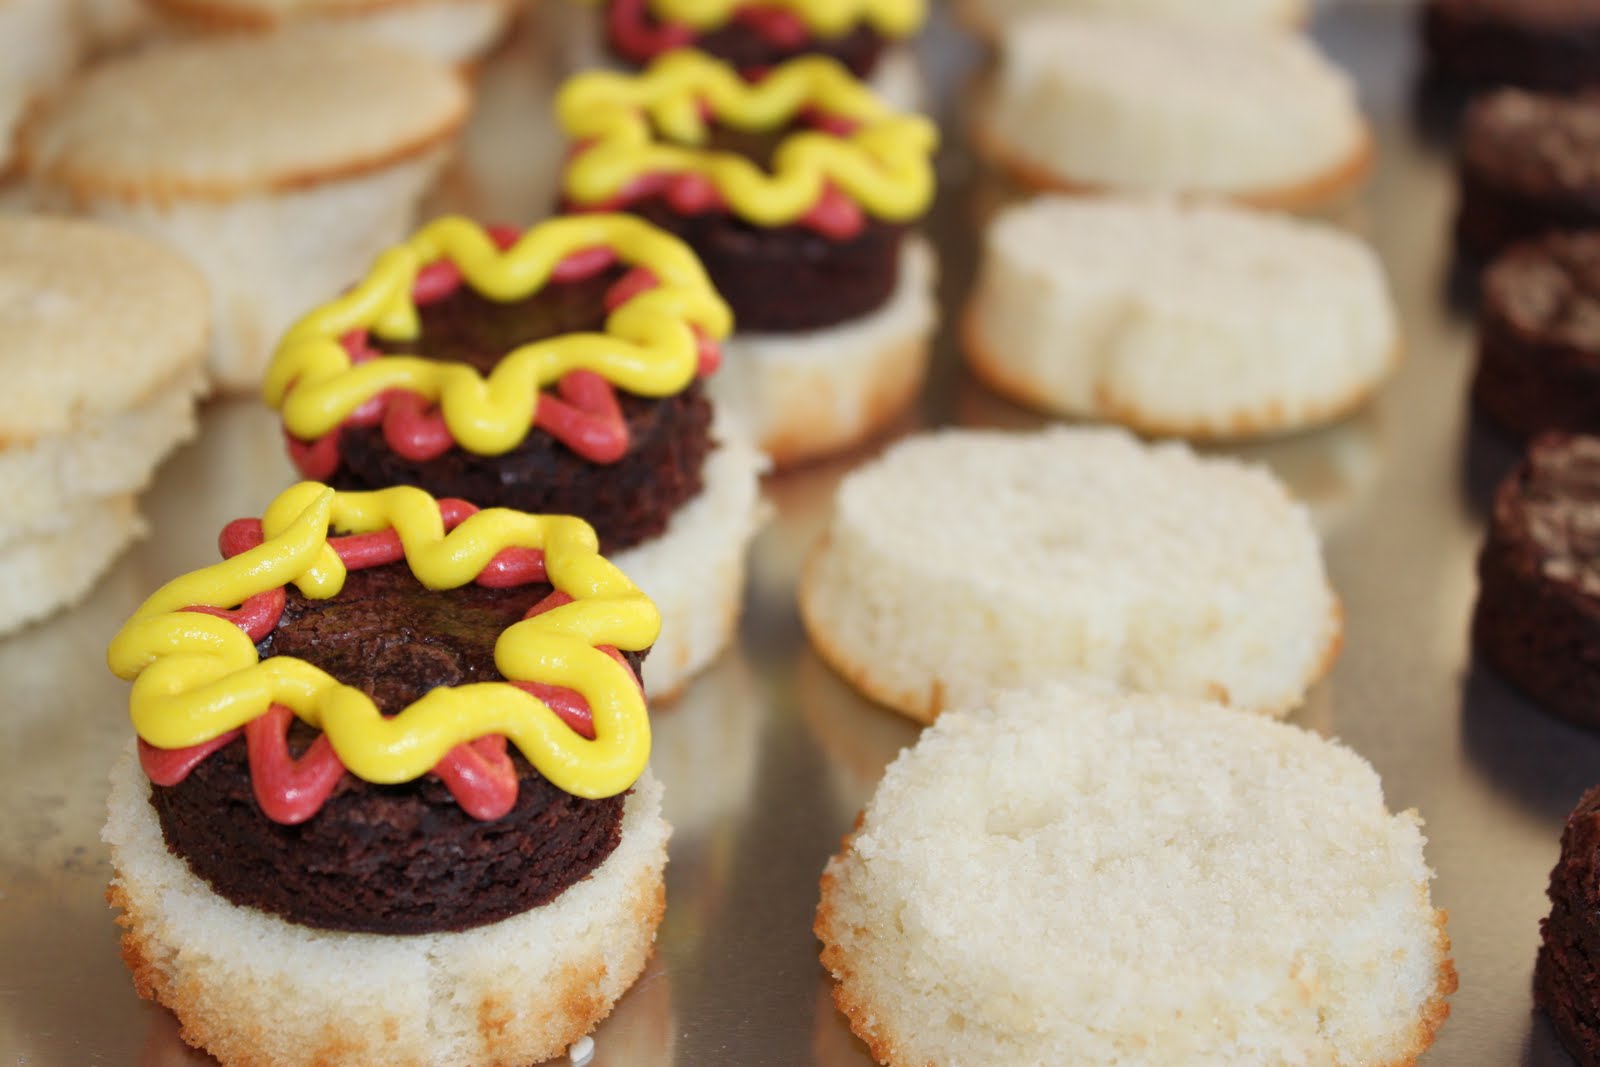
Here are some step-by-step photos for assembling the perfect burger cupcake.

Bake a batch of vanilla cupcakes and then remove the paper liners.

Use a serrated knife and slice each cupcake horizontally to create the top and bottom half of the burger bun.
Bake a batch of brownies in a 9 x 13 pan. Once the brownies have cooled use a round cookie cutter, about 2" diameter to make your burger patties.

Place your "buns" and "burgers" on a tray in rows to make for easy assembly.

Make a batch of vanilla buttercream and tint in 3 colors: Red = ketchup, Yellow = mustard, and Green = lettuce. Place icing in piping bags fitted with tips for easy decorating. I used small round tips for the ketchup and mustard and the Wilton 104 tip for the lettuce.

Place the burger on the bun.

Add a squiggle of ketchup.

And a squiggle of mustard.

And some lettuce. Don't worry about being perfect with the icing, just squeeze it out and swirl it on allowing for some to overhang the edge of the brownie.

Add on the top bun and sprinkle with a few sesame seeds. Looks like the real deal from McDonald's doesn't it...only much sweeter!

And the burger assembly continues.


With football season just getting started these would be the perfect addition to any tailgating party. Or the perfect excuse to indulge in two desserts at once...cupcakes and brownies all in one bite! YUM!

Monday, September 6, 2010

Hibiscus Flowers

Hope everyone is having a great labor day! I know I've been enjoying lounging around and working on few house projects! I'm also super excited to share with you a tutorial on how to make a hibiscus flower that was the focal point of my latest cake.

This was a birthday cake I made for my friend's mom. It was this Peanut Butter Chocolate Cake recipe with the addition of purple hibiscus.

These flowers were super easy to make and only require a few cake decorating tools.

So let's get started on the step-by-step instructions. All the tools used below are Wilton brand that can be found at your local cake decorating store.


1.Tint some rolled fondant to your desired color and roll out about 1/8" thick. Use a 5 petal flower cuter to make the outer shape of the hibiscus.

2.Place the fondant flower onto a piece of square foam and roll around the edges with a large ball tool to thin out the edges of the flower.

3.This is what the flower will look like after you have rolled around the edges.

4.Use a shell tool and go around the flower petals and gently press down to create a lined imprint.

5.Here's a look at what the shell tool looks like.

6.This is what the flower will look like after you have pressed all the edges.

7.Pinch the bottom of the flower with your fingers so that it looks bunched together. Add some flower stamens to the center. Place flower in forming cup to harden so it will hold its shape.

8.If you want to create a 2-color flower then use the flower star tool to create the inside shape. Tint some more fondant in a complimentary color for the center.

9.Cut the tips off the star shape so that it fits within the outer flower shape.

10.Place the star shape on top of the rounded petal flower.

11.Use the shell tool and gently imprint all the petals as shown above.

12.Pinch the flower in the center with your fingers.

13.Add flower stamens and allow to harden. My flowers are actually sitting inside of the bottom of my 1A round tips, they were the perfect size to hold the flower.

14.Once the flowers had started to harden I moved them over to some flower formers to dry over night before placing them on the cake.

And there you have the hibiscus flower!

The hibiscus would also be super cute on a Hawaiian themed cake in vibrant pinks, yellows and reds or even on top of some cupcakes for a summer luau party!

Friday, September 3, 2010

Cupcake a Week: Tiger Paws

Who's ready for some football? At my house we will be tuned into the Clemson Tigers as they take on North Texas on Saturday! Randolph and I are both Clemson alumni so we will be cheering on our tigers for their first big game of the season! And of course as we watch a little pig skin we will be snacking on some fabulous tiger paw cupcakes! Go TIGERS!

What football games will you be watching this weekend?

Thursday, September 2, 2010

Thursday's Surprise!

Today it came...a package I had been waiting on for about a month now...any guesses what's inside?

I'll give you a clue...its a book about baking of course. Do the pictures give it away yet?


It's Bakerella's new CAKE POPS book, my very own copy! If you have never heard of Bakerella or cake pops for that matter, then stop what you are doing right this second and head over to her blog immediately. Plan to stay there a few hours too. Her cake pops are absolutely amazing and unlike anything I have ever seen before! As you can see from the cover of her book she has come up with some pretty unique creations that are made entirely out of cake, icing and candy decorations all placed on a lollipop stick.

So I'm going to give you a sneak peak inside her book, trust me you are going to want to go out and grab one for yourself. I love how the book is spiral bound so that when you flip through the pages it lays flat.

Here's where it all started with her red velvet cake balls.

She shows step by step photos of "the making of a cake ball".

And here is her very first experiment with the cake lollipop. So there you have the basics, but wait until you see how creative she gets from here.

Clown pops! Are these not the cutest things you have ever seen? I love the red candy to resemble the curly hair and using the tip of an ice cream cone for their hats, simply genius!

Babies with pacifiers. These would be perfect for a baby shower or a new mom!

I love these farm animals. I think the cows are my favorite with the one black eye.

And this is only a glimpse into the world of cake pops. There are 40 unique ideas in her book and her blog is filled with even more, you are sure to find something for any occasion. So if you want to buy your own copy of Cake Pops then head on over to Amazon and order one today. While you're there check out Bakerella's quick "how to" video as well.

Have you ever made cake pops before? If so let me know what your favorite kind to make are or which ones you would love to learn how to make!

Tuesday, August 31, 2010

Brown & Blue

Brown, Blue & Polka Dots seem to be popping up all over the place these days! I absolutely love polka dots, so I was so excited when I found out this was going to be the design theme for a recent baby shower cake I made.

It was a 3-layer Oreo cake with chocolate buttercream. YUM!

The requirements were brown icing with light blue polka dots. Simple enough. I decided to stick with only one size for the polka dots to make a more uniform looking cake.

With a "T" on top for the baby's name "Tristan"...such a cute name.

The polka dots and "T" were made out of rolled fondant.

I used a Wilton #5 round piping tip to make a bead border around the bottom edge.

This cake would also be cute using brown & pink for a little girl, or even yellow for a gender neutral party.

On a side note, my cousin just found out today she is having a girl! This will be her first child and I'm already trying to think of cute desserts that would be perfect for her baby shower! The baby is due on Christmas Eve, how special is that! You can guarantee I'm going to start researching now for some adorable baby shower themes and dessert table ideas. I'll be sure to keep you updated on all the details and show pictures of whatever sweet treats I make for her special day!
Related Posts with Thumbnails